

 DigiMEDSPA EMR
 DigiMEDSPA CONNECT ™
How to Set Up Your Second Med SPA Location for e-Prescribing?
This guide provides clear, step-by-step instructions for setting up your second Med SPA location for e-Prescribing, helping you streamline operations and ensure consistency across all locations.
Understanding Terminologies
e-Prescribing
e-Prescribing is the electronic generation, transmission, and filling of a prescription. Healthcare and Med SPA providers create and send prescriptions directly to pharmacies through a secure, digital system, reducing errors and improving the efficiency of the prescribing process.
Set Up Second Med SPA Location for e-Prescribing
- The user can set up a second Med SPA location for e-Prescribing by accessing the e-Prescribing Dashboard.
- From the EMR Panel, click on “e-Prescribing Dashboard” under “e-Prescribing.”

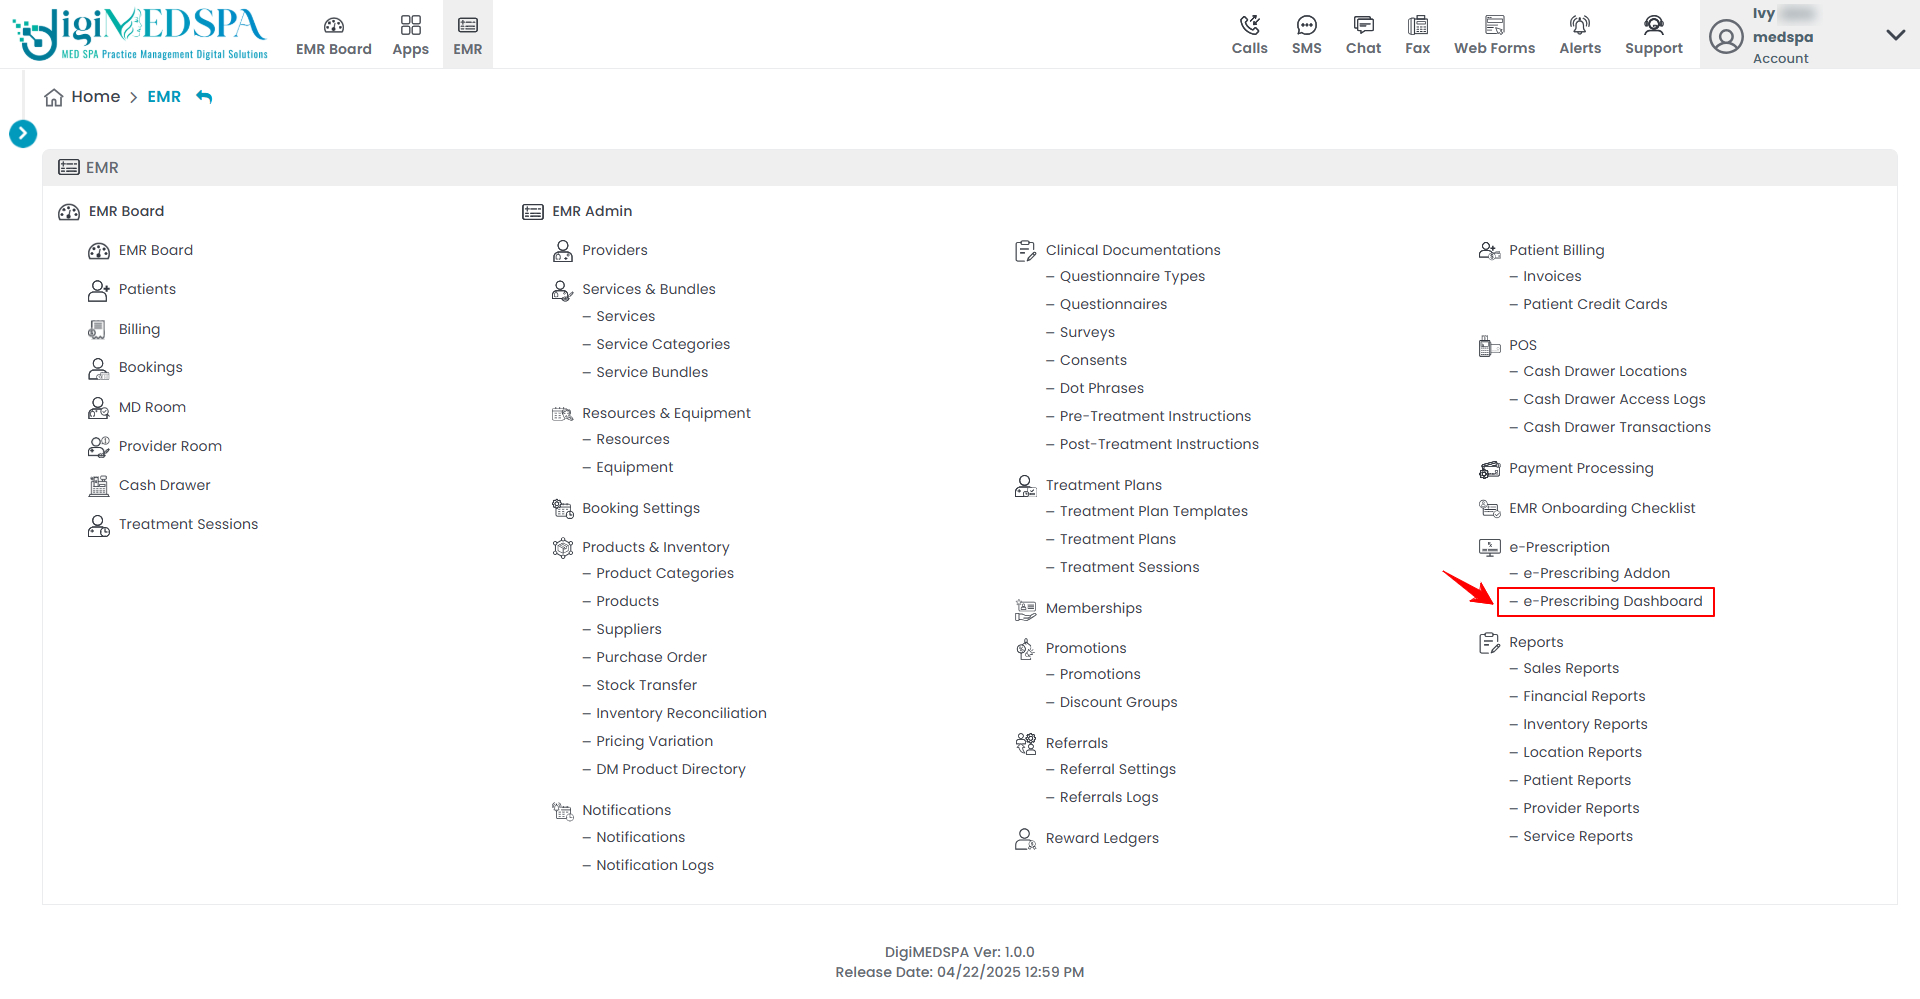
- From the Left Navigation, open the “EMR Admin” dropdown menu, select “e-Prescribing,’’ and then choose “e-Prescribing Dashboard” from the subsequent dropdown menu.
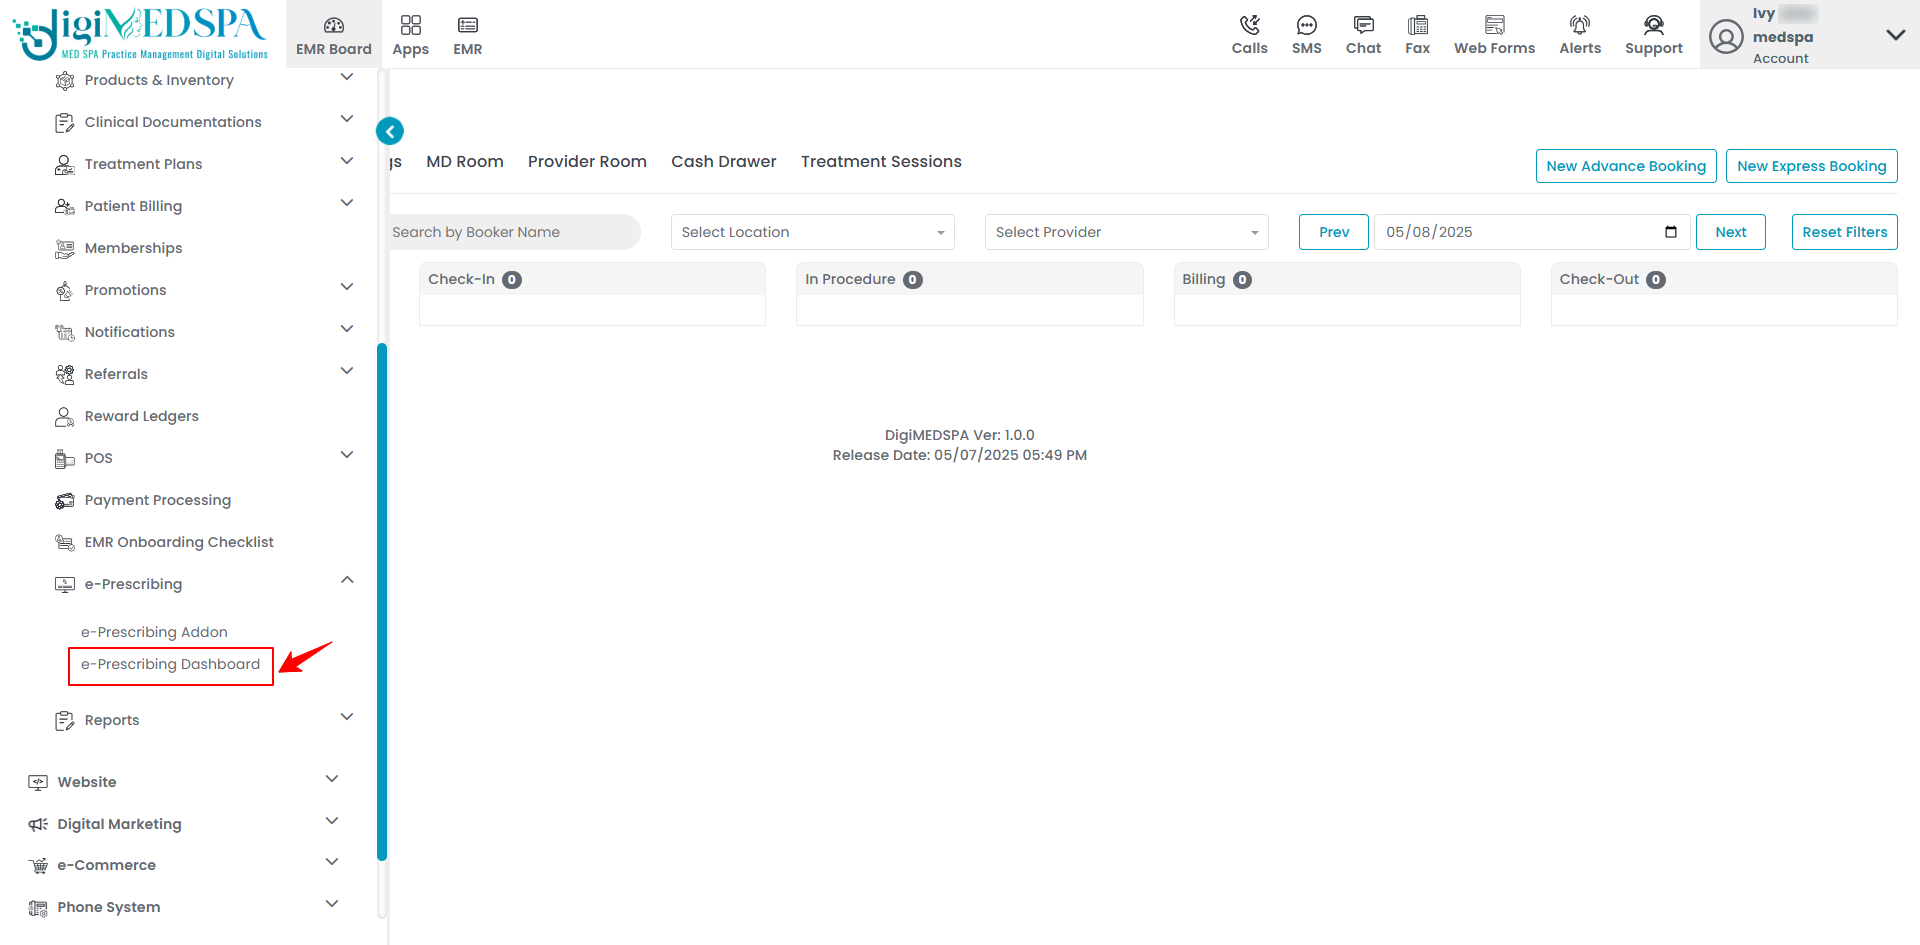
- From the EMR Panel, click on “e-Prescribing Dashboard” under “e-Prescribing.”
- On the e-Prescribing Dashboard, click the user profile dropdown menu in the top right corner of the screen, then select “Manage Users & Practices.”
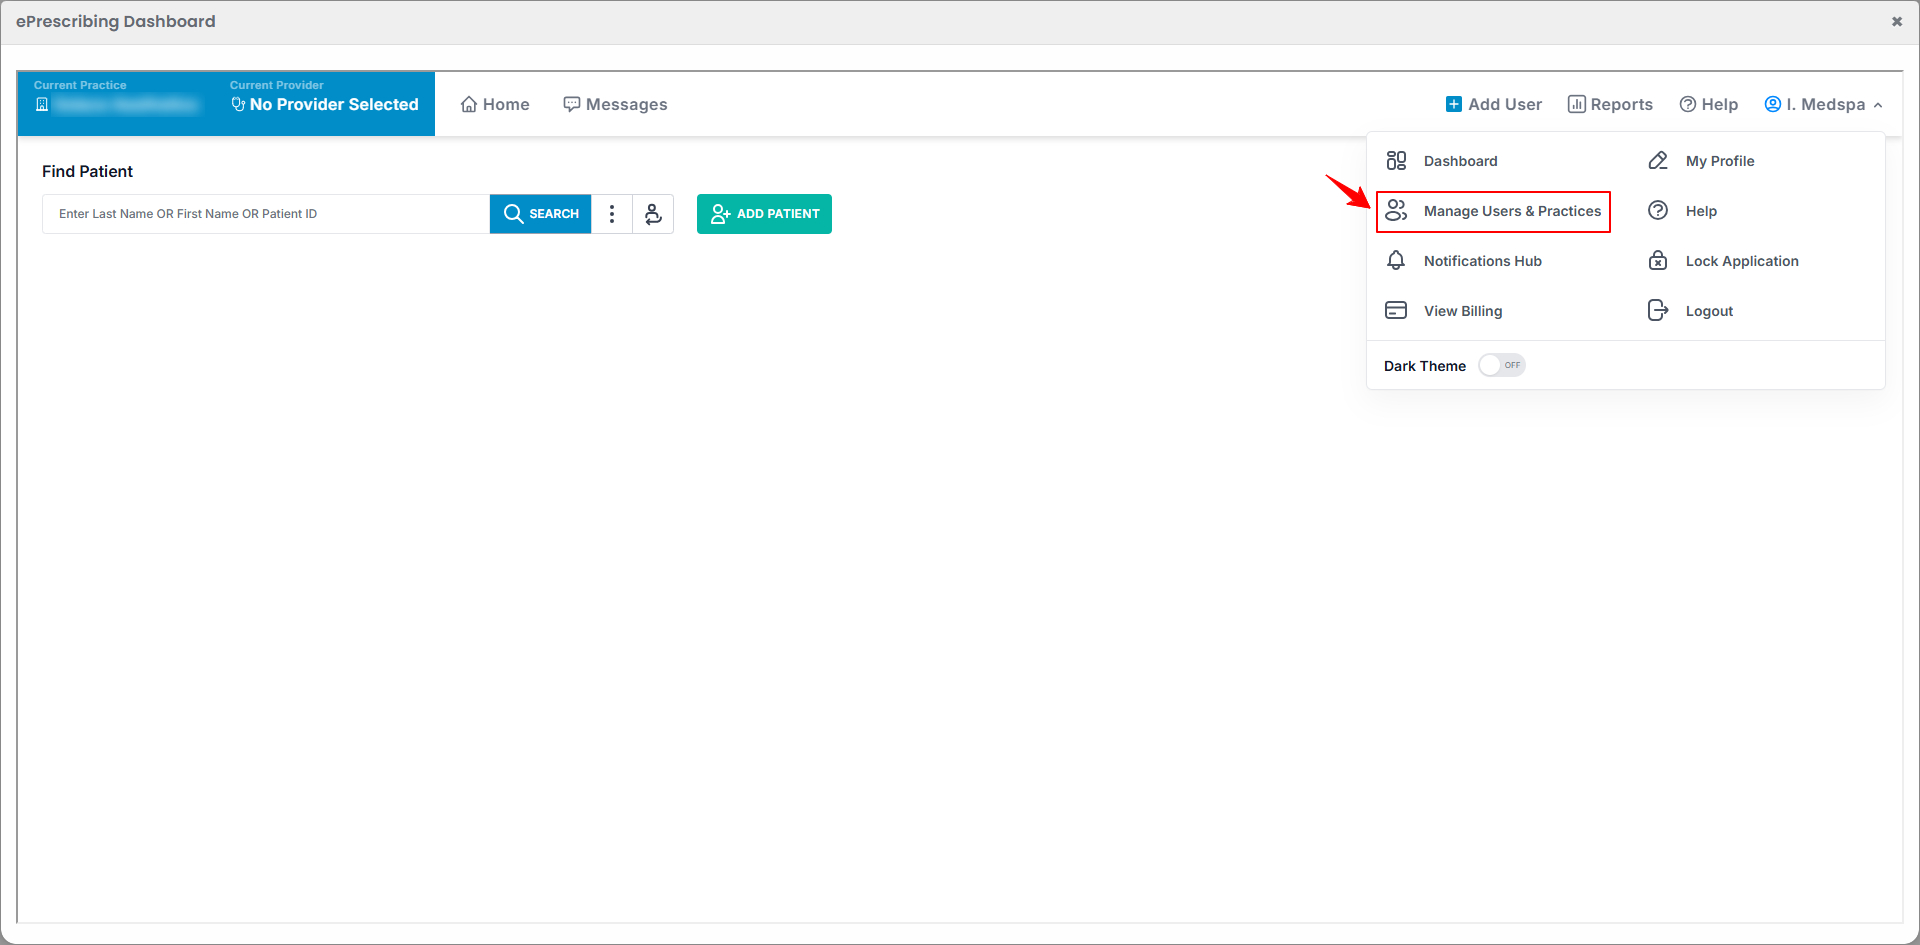 Note: The option to manage users and practices is only available through the Med SPA's profile. Providers cannot manage users or practices from their own account.
 - To set up a second location for your Med SPA, click on the “+Create New Practice” button in the top right corner.
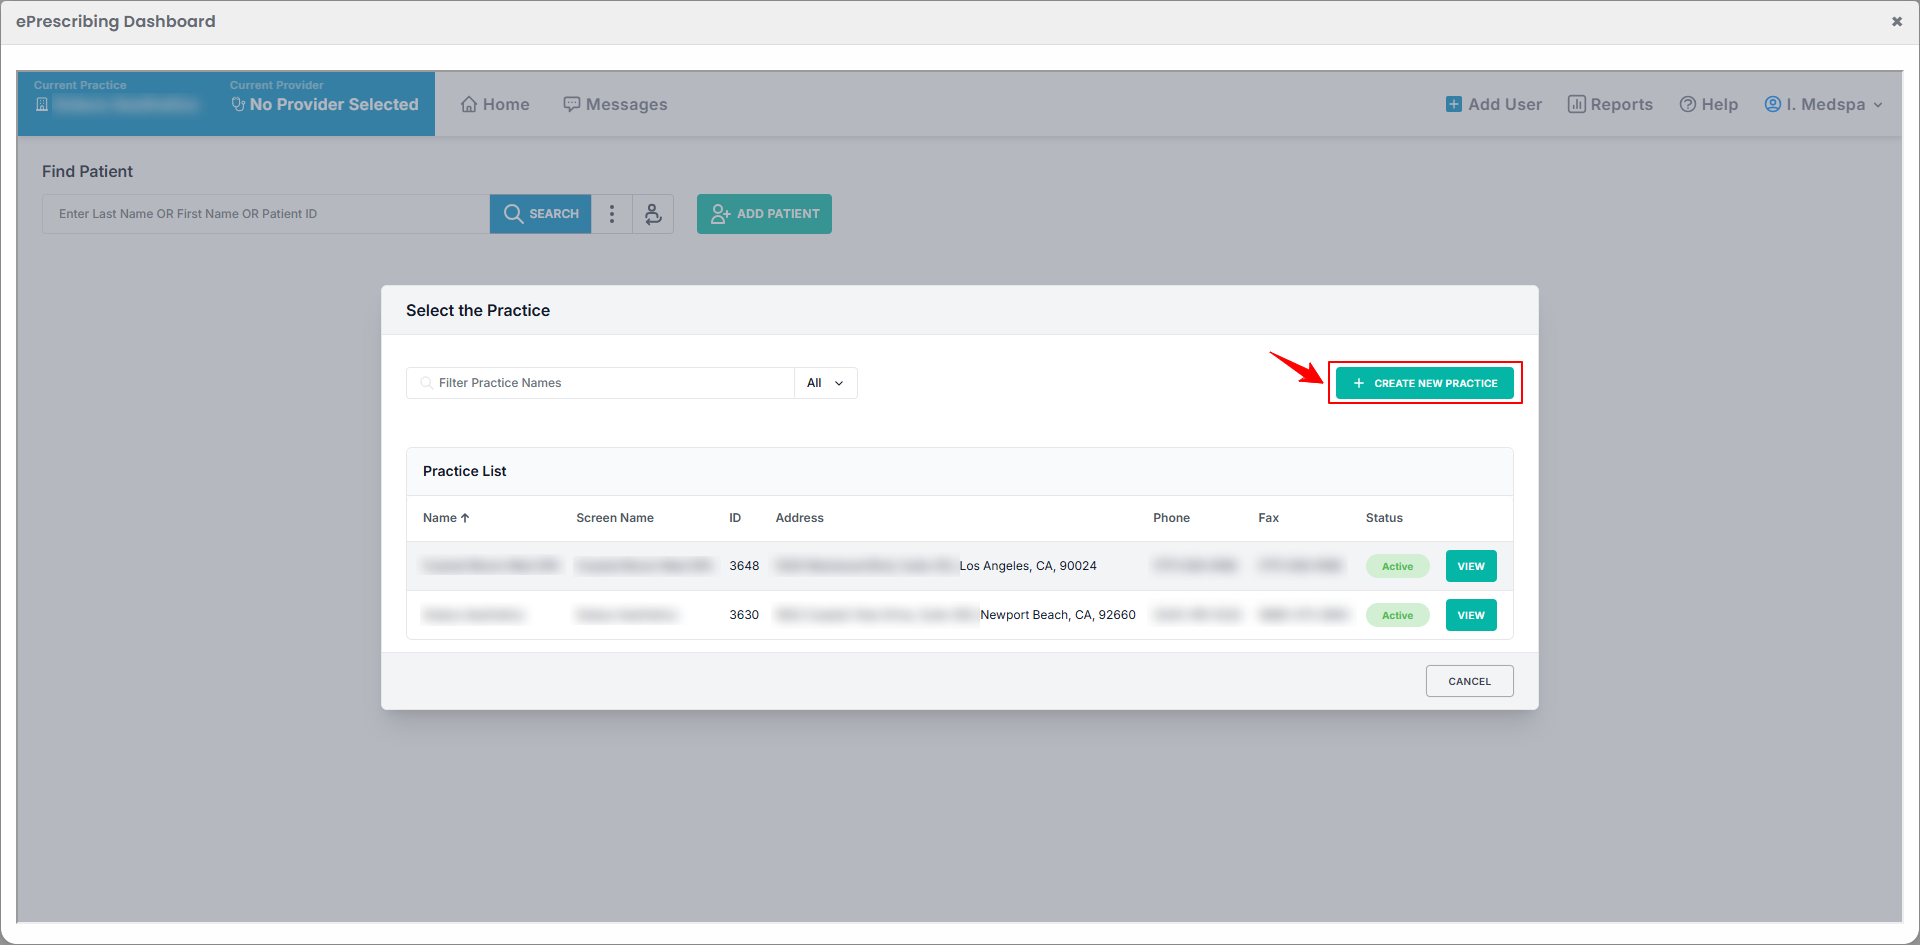
- A form will appear to create a new practice. Set the Practice Status to "Active."
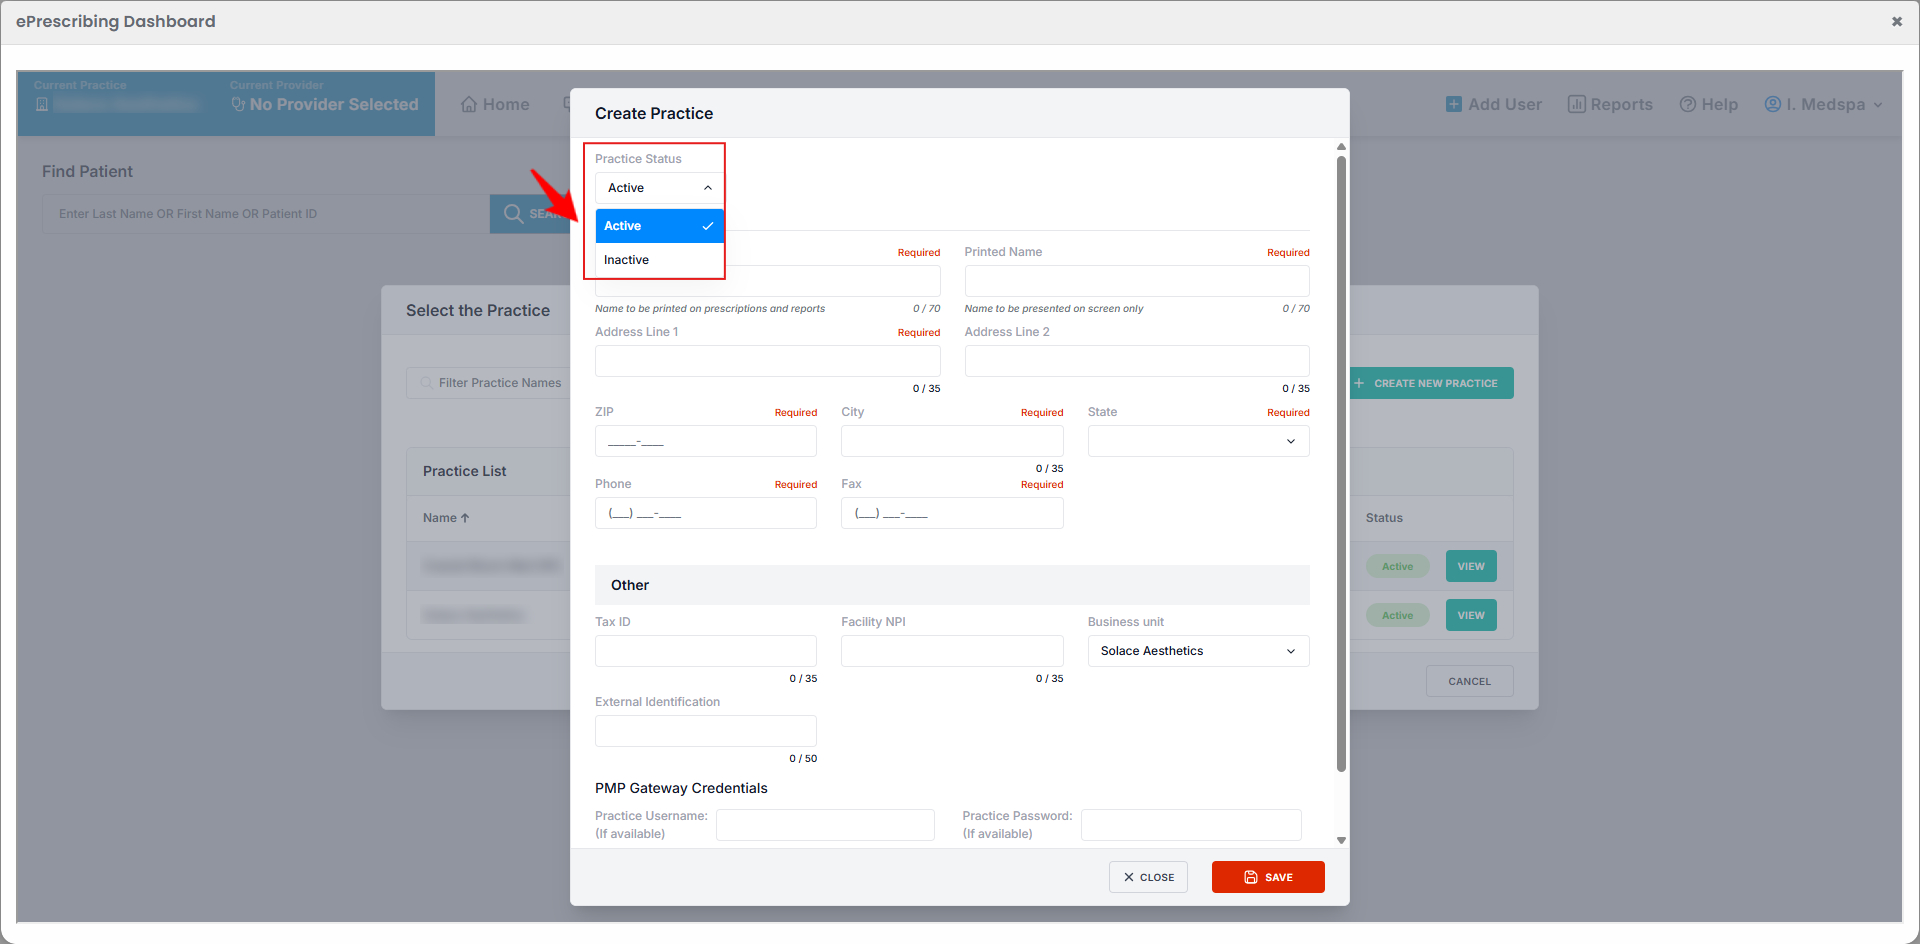
- Enter the Practice Name, Printed Name, Address, Zip Code, City, State, Phone, and Fax numbers. Once all required fields are completed, click “Save” to add the new location as a separate practice in the e-Prescribing Dashboard.
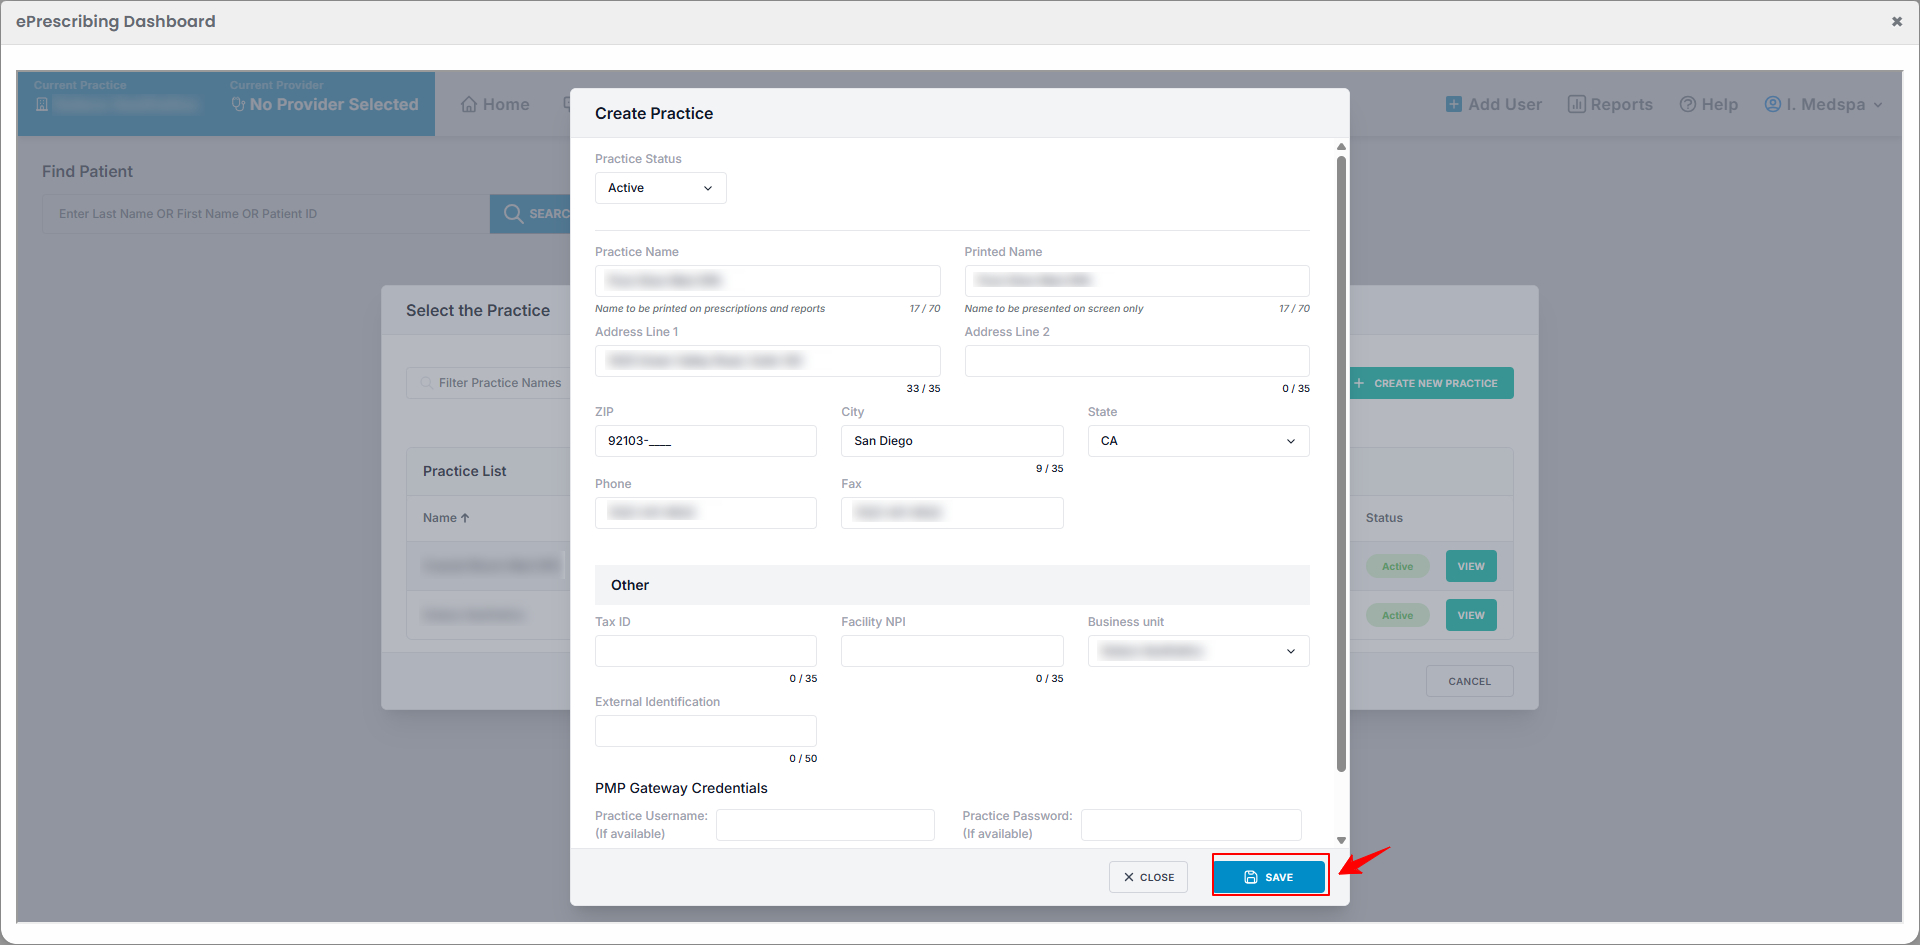 The second location of your Med SPA has been successfully added!Note: All details of the Med SPA location must be consistent with the information you provided in the portal during the location setup.
View Med SPA Location for e-Prescribing
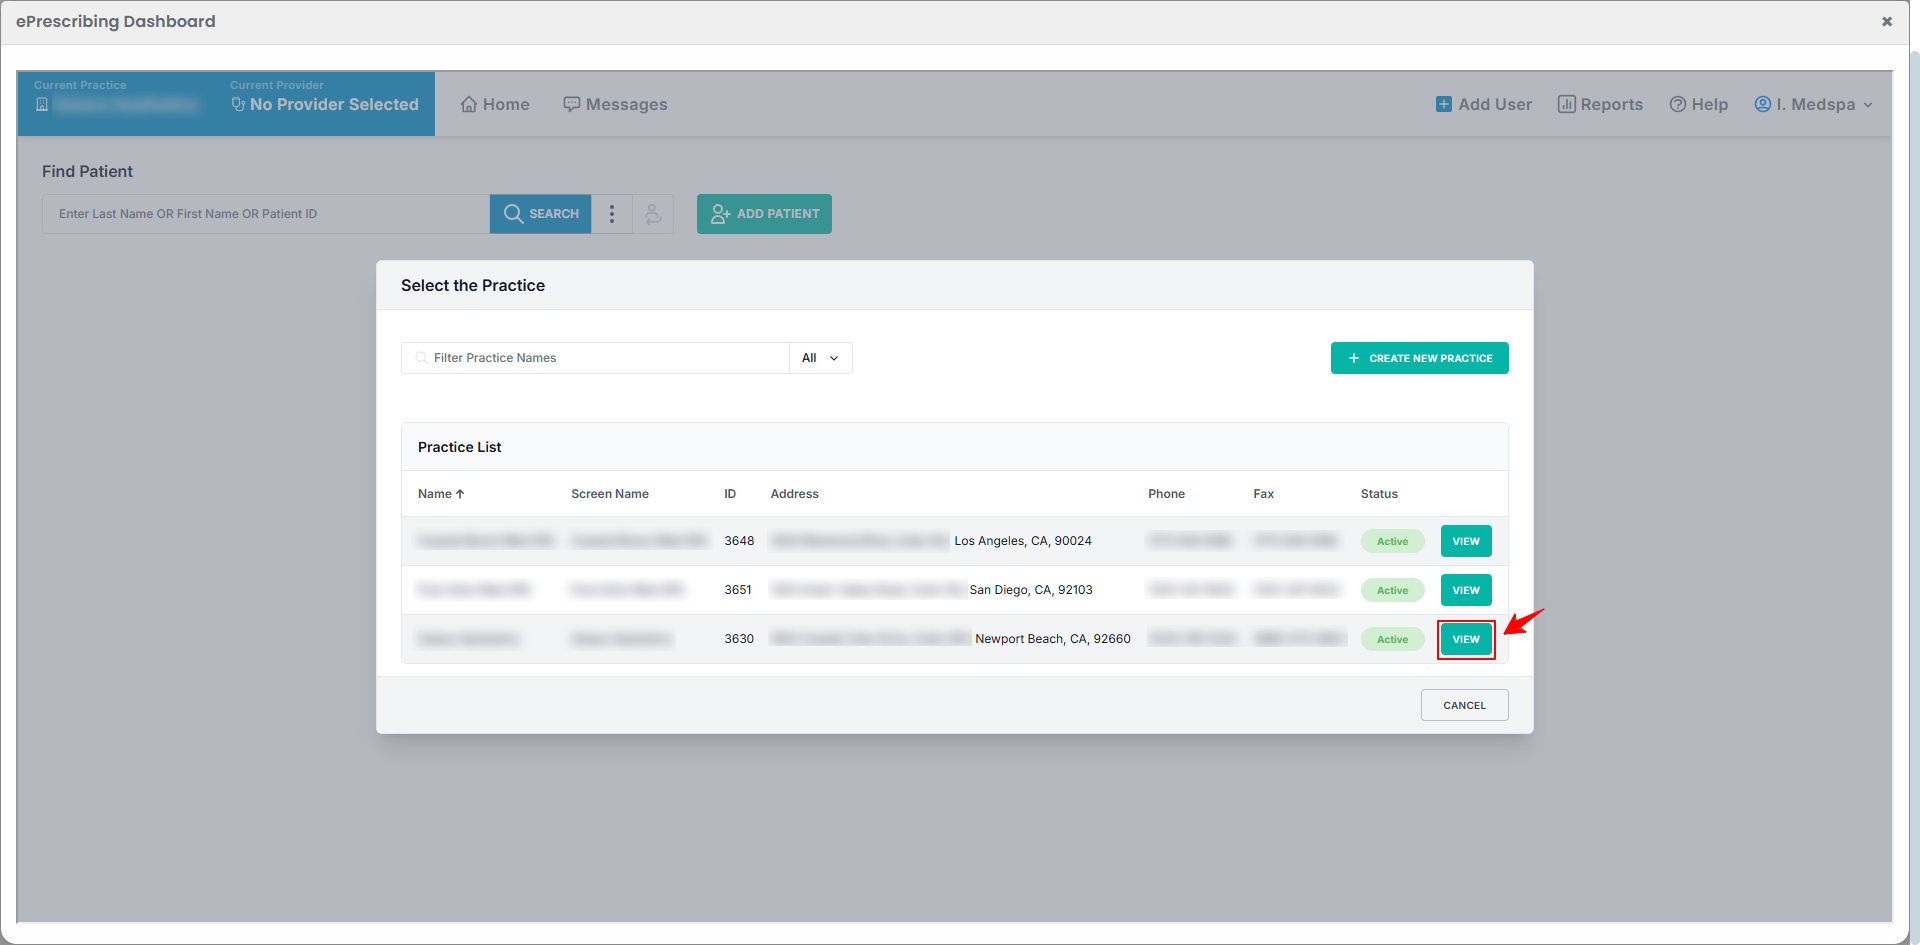
- The added location will appear in the list with the other locations. To view its details, click the “View” button next to the desired location.
- The Location View Screen will open, showing complete details of the practice and its users.
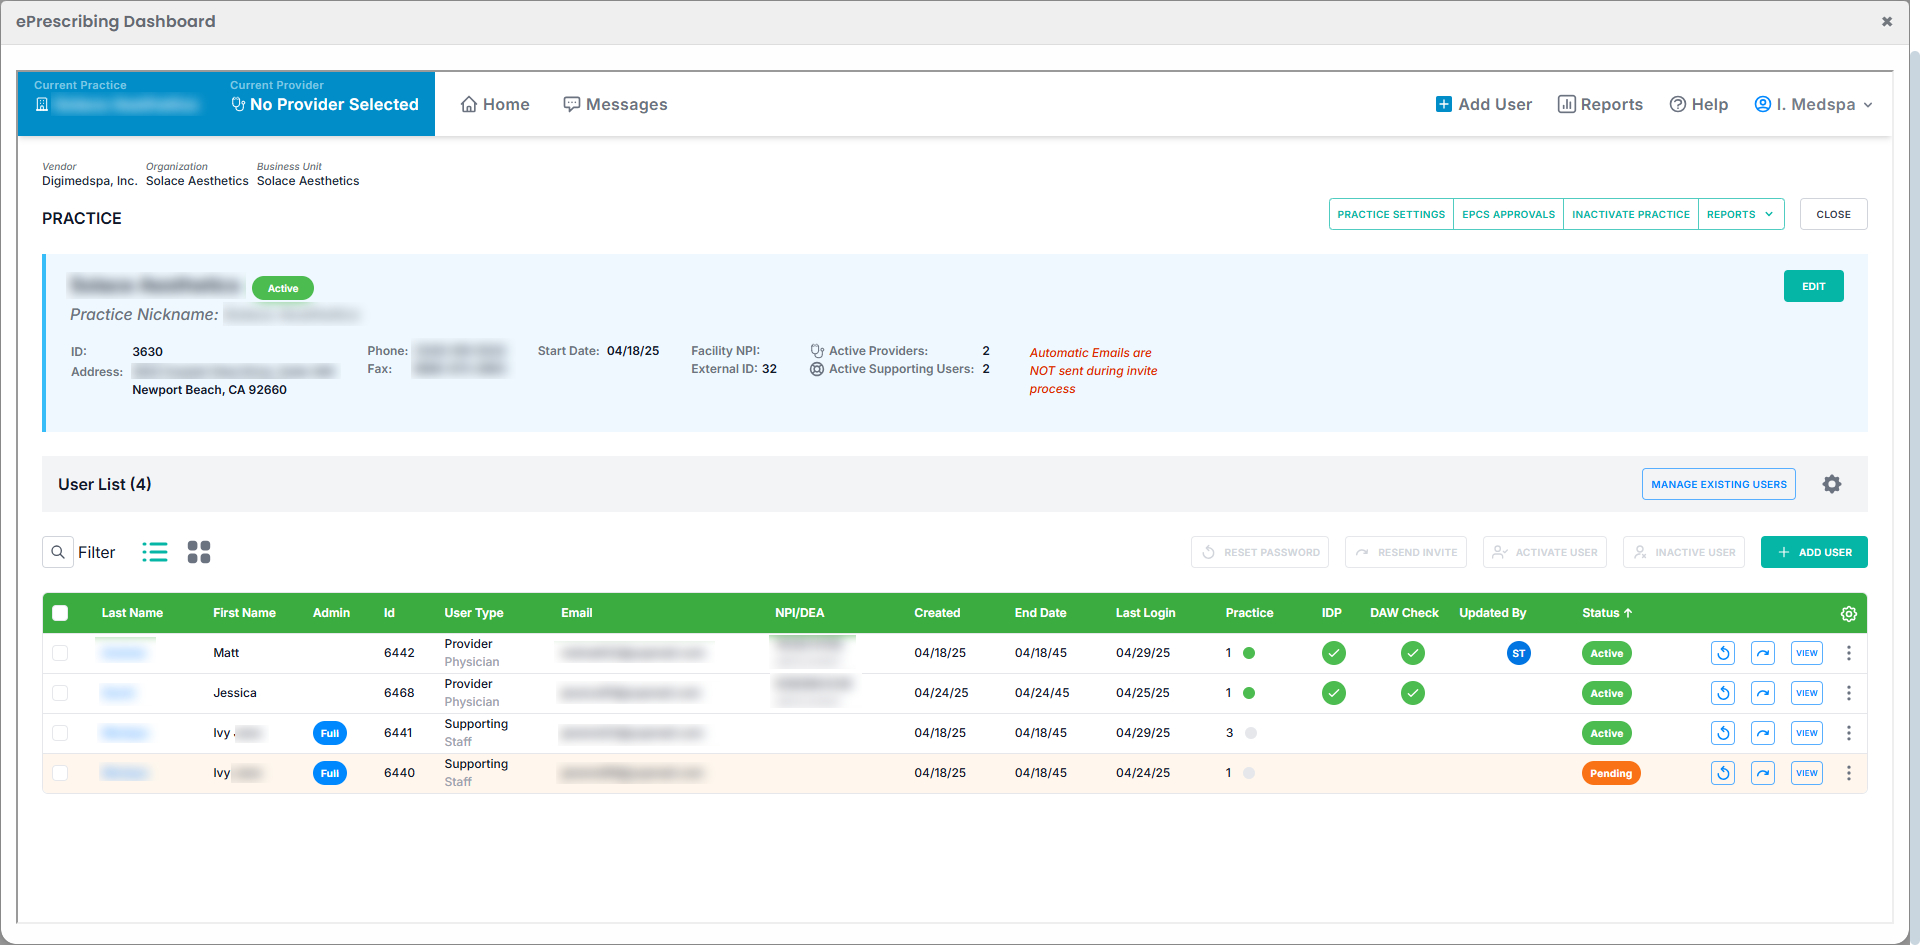
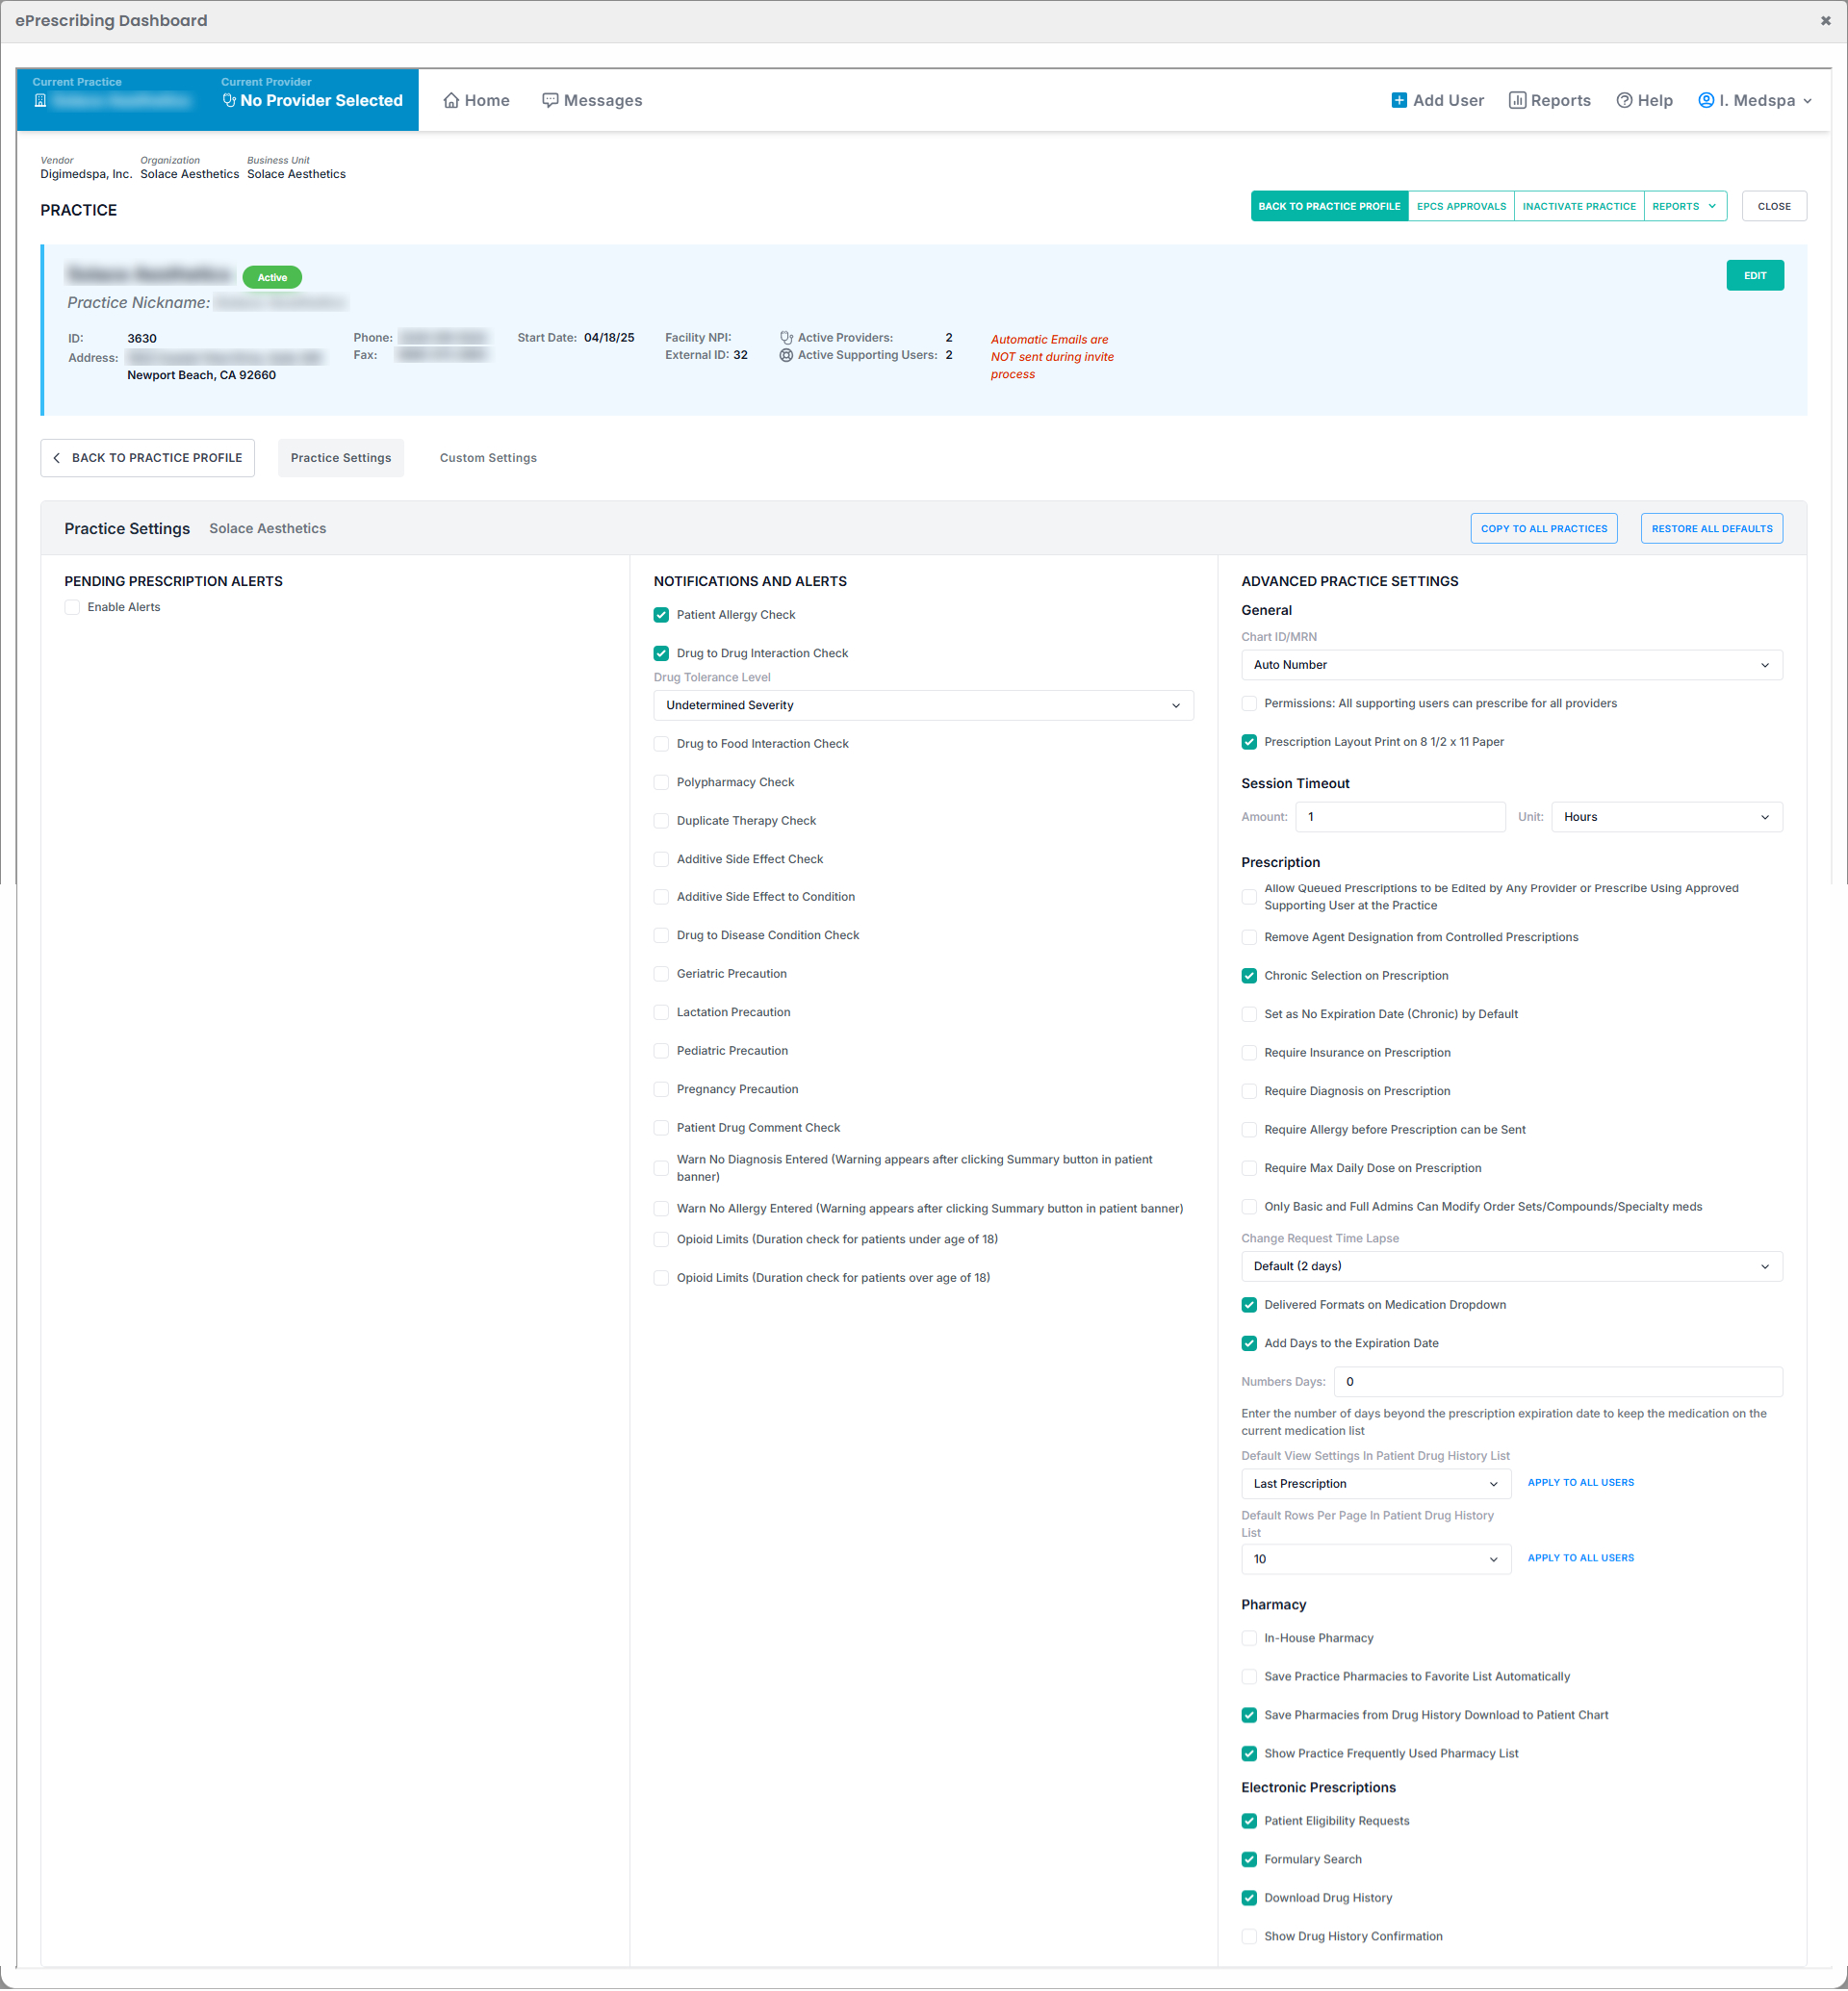
- Click “Practice Settings” to view all settings and configuration details for the practice.

- Here you can manage Notifications, Alerts, and other Advanced Practice Settings.
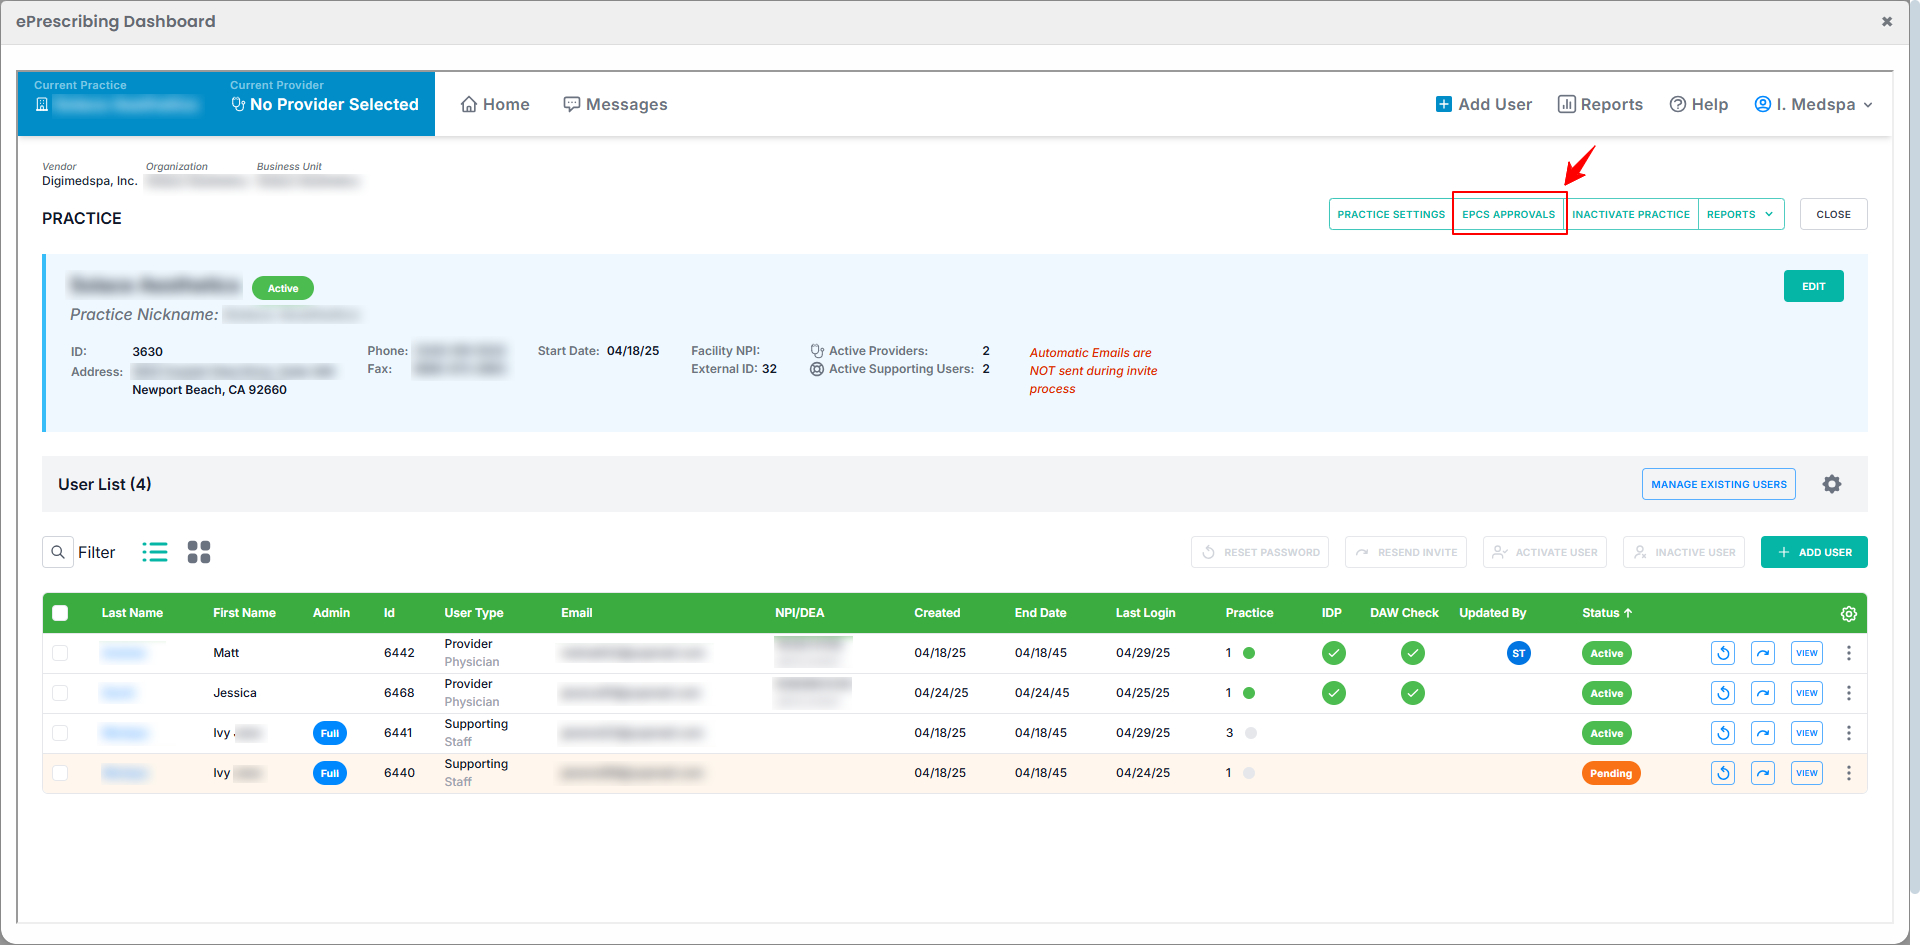
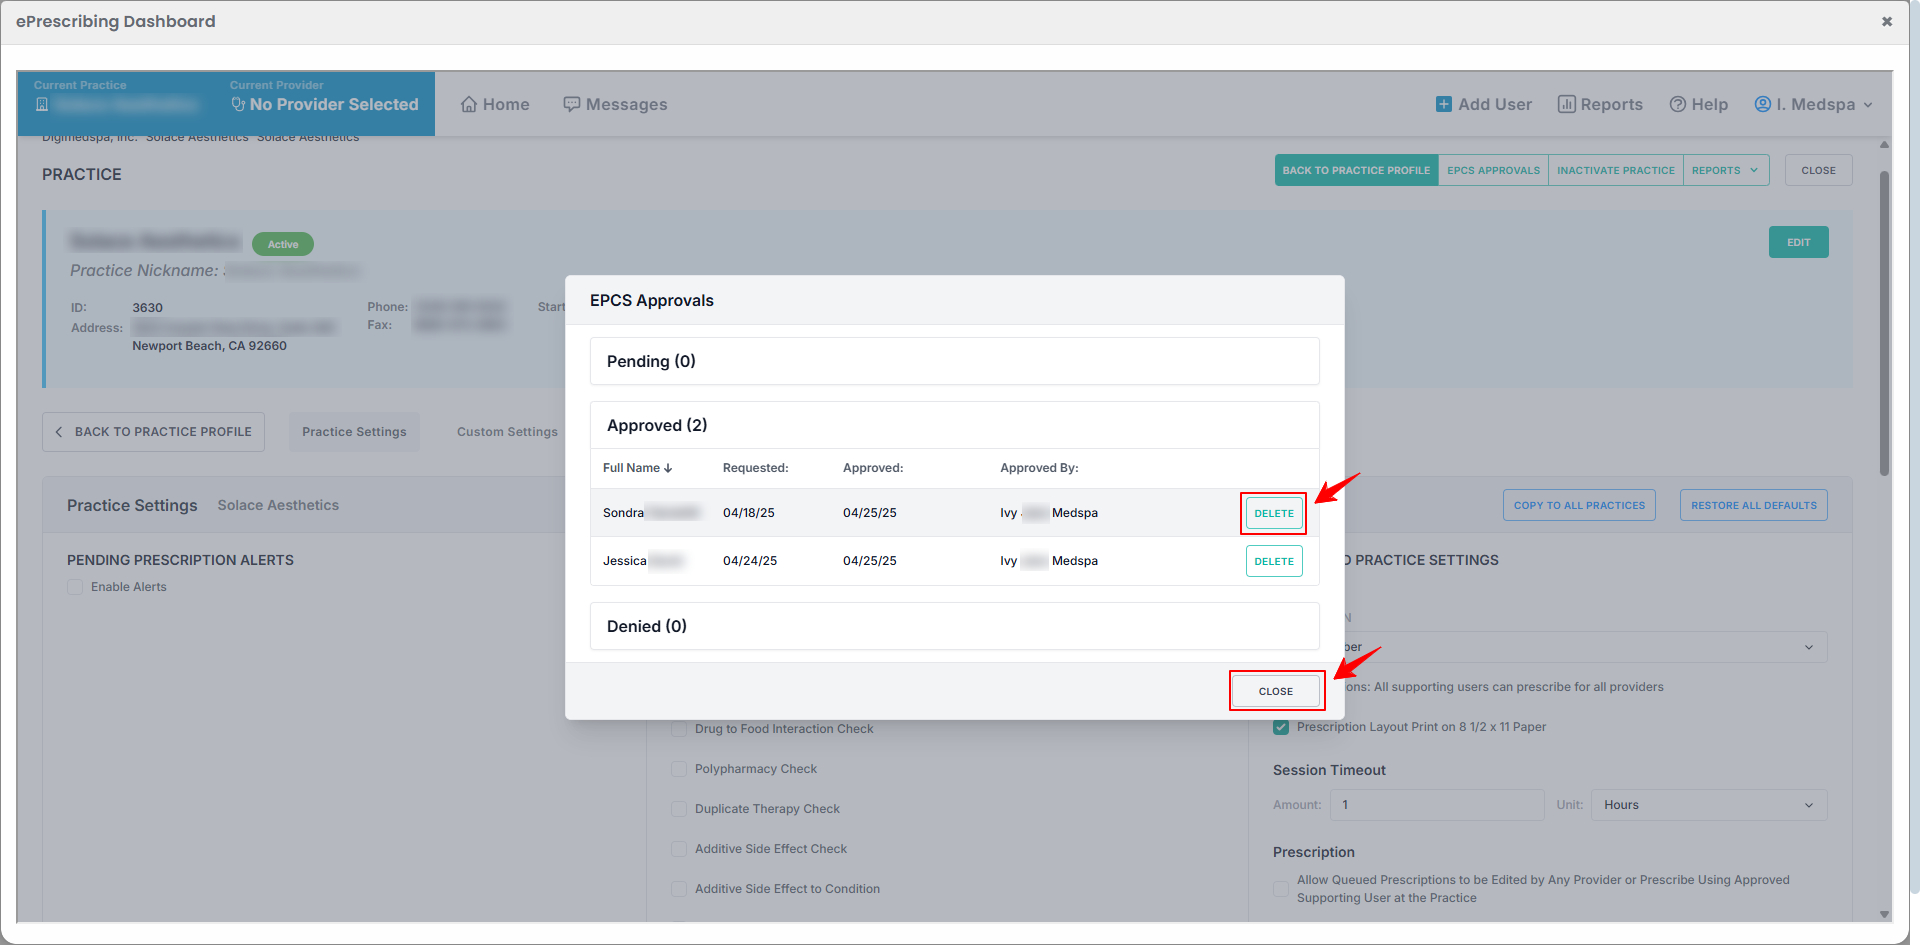
- Click “EPCS Approvals” to view the approval status of prescribers.
- View the list of Pending, Approved, and Denied prescribers. To remove a prescriber, click the “Delete” button next to their name, then click “Close” to finish.
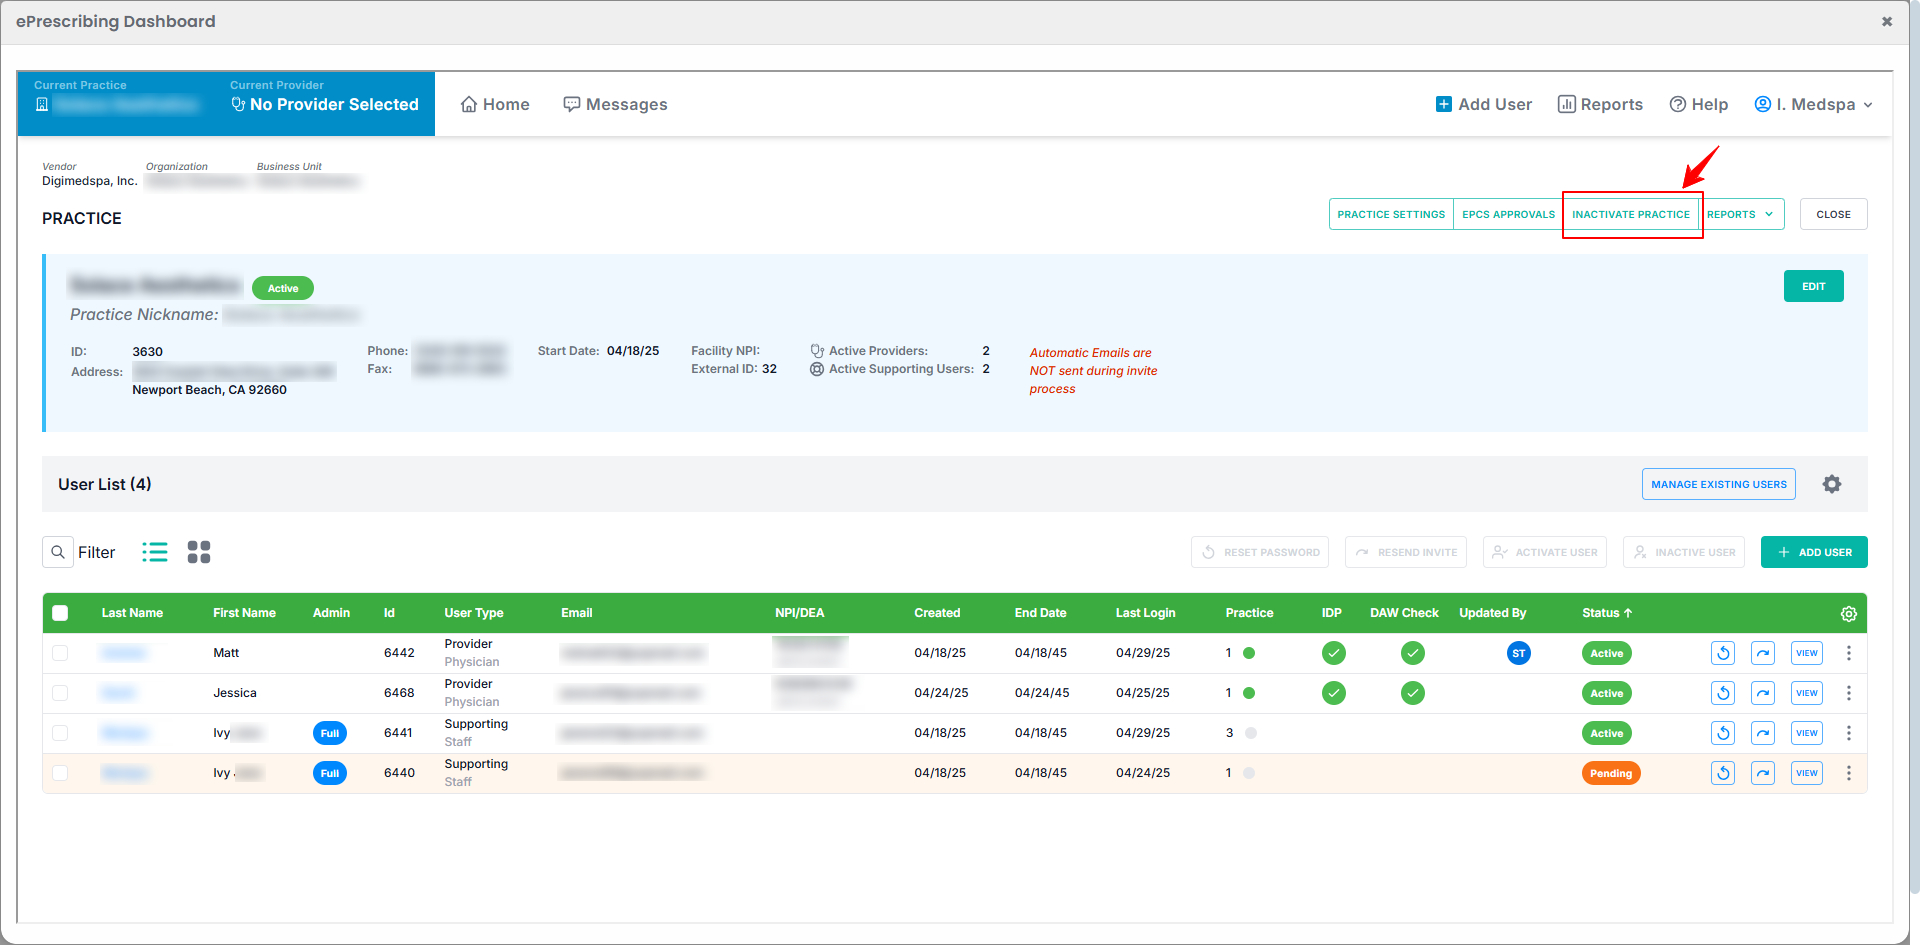
- To inactivate the practice, click “Inactivate Practice.”
- To view the practice activity log, click the “Reports” dropdown menu and select “Practice Activity Log.”
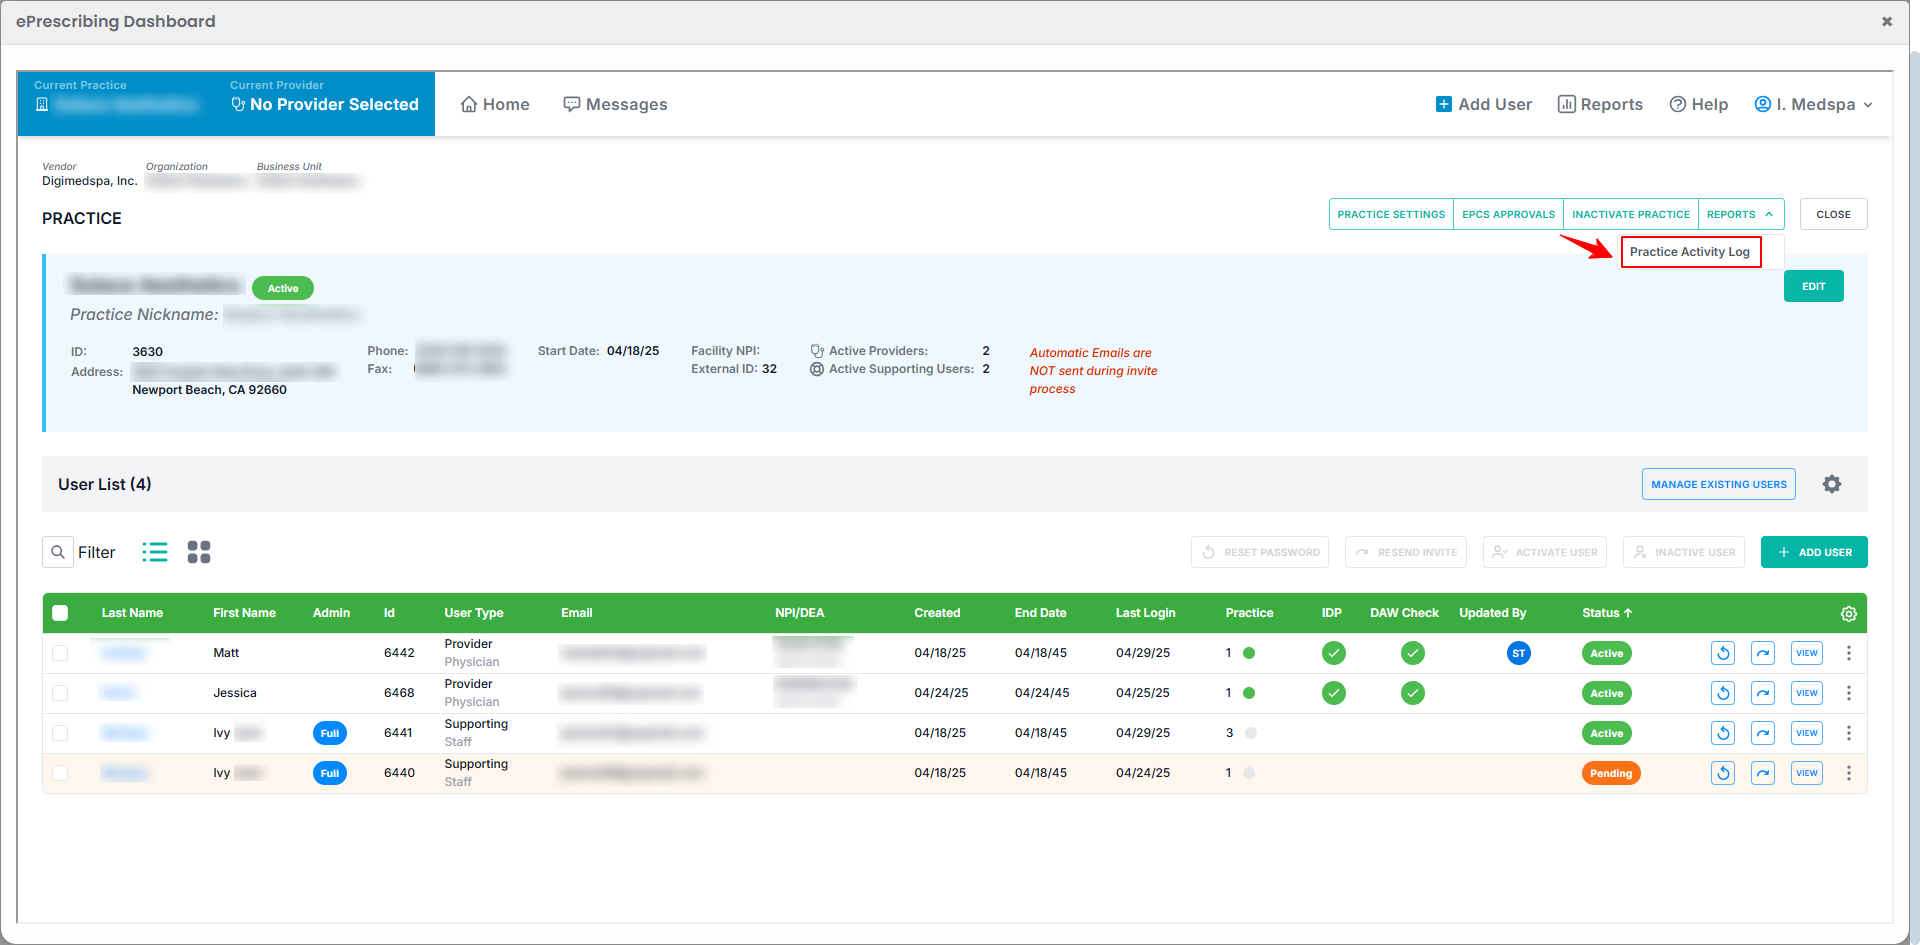
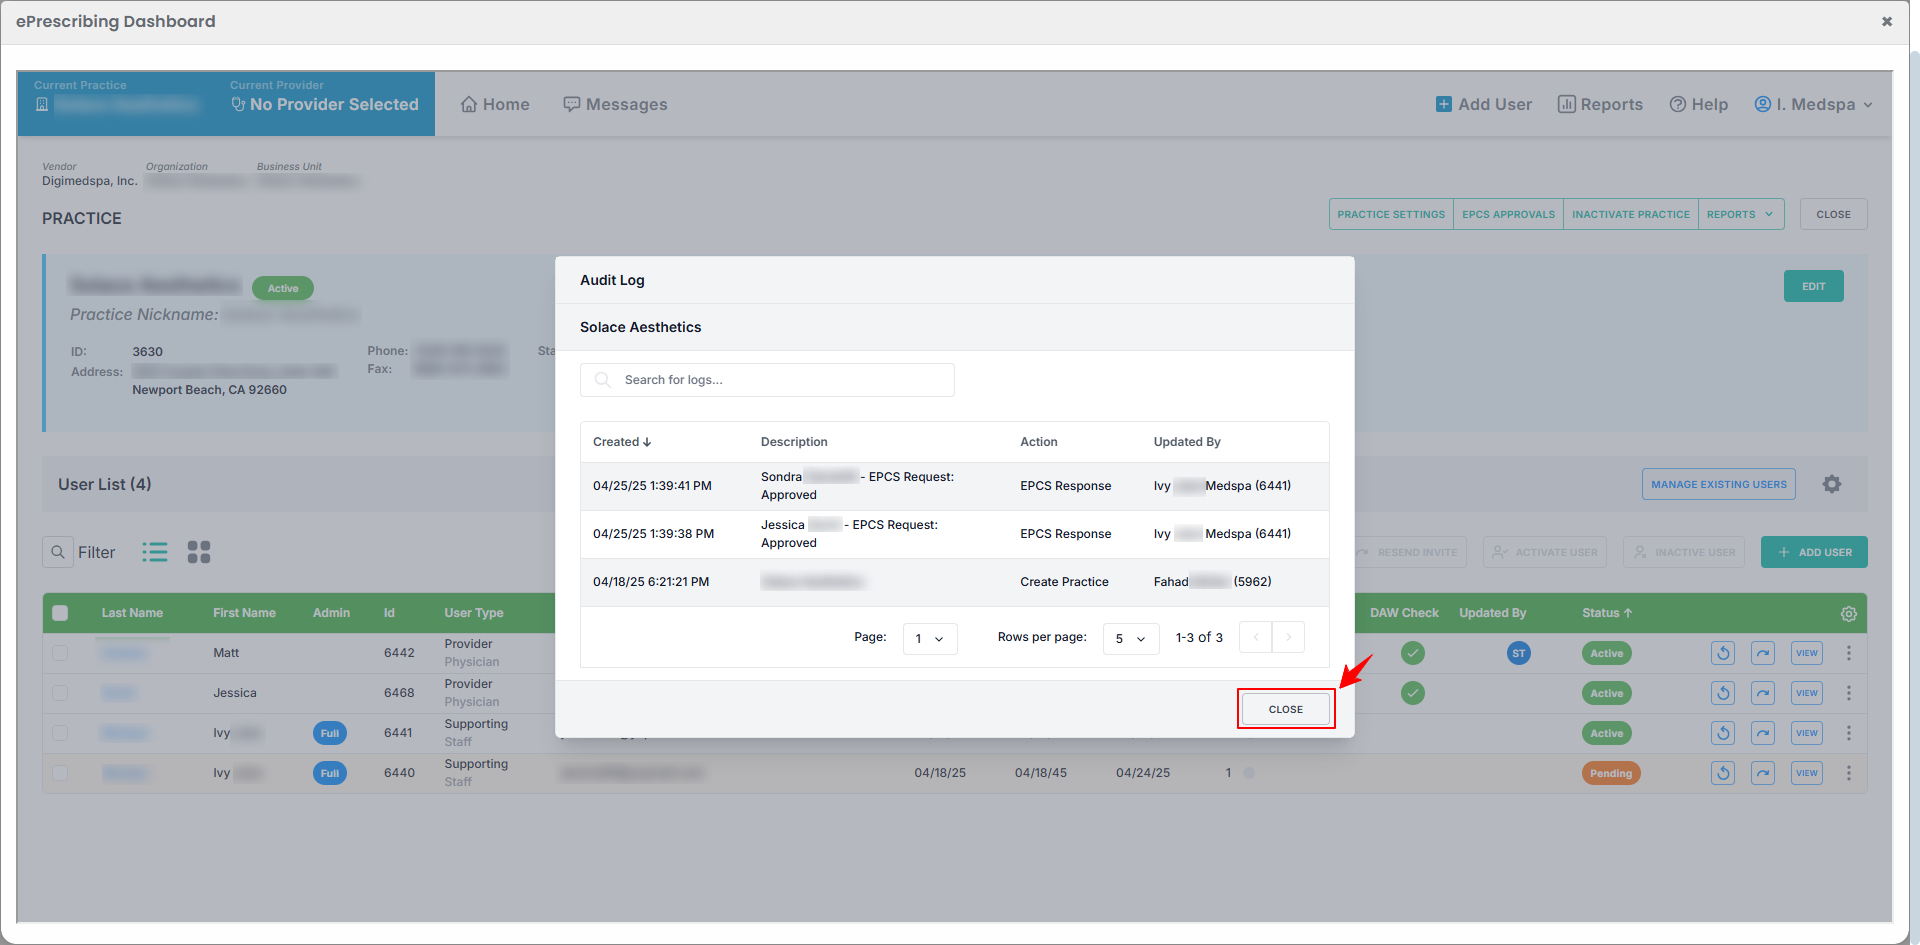
- The Audit Log window will open, displaying all recorded practice activities along with the date, time, action details, description, and the user who performed the update. After reviewing the activity, click “Close” to close the window.
- To change the practice location, click “Current Practice” on the left side of the screen, then click “Select” next to the practice you want to set as the current location.
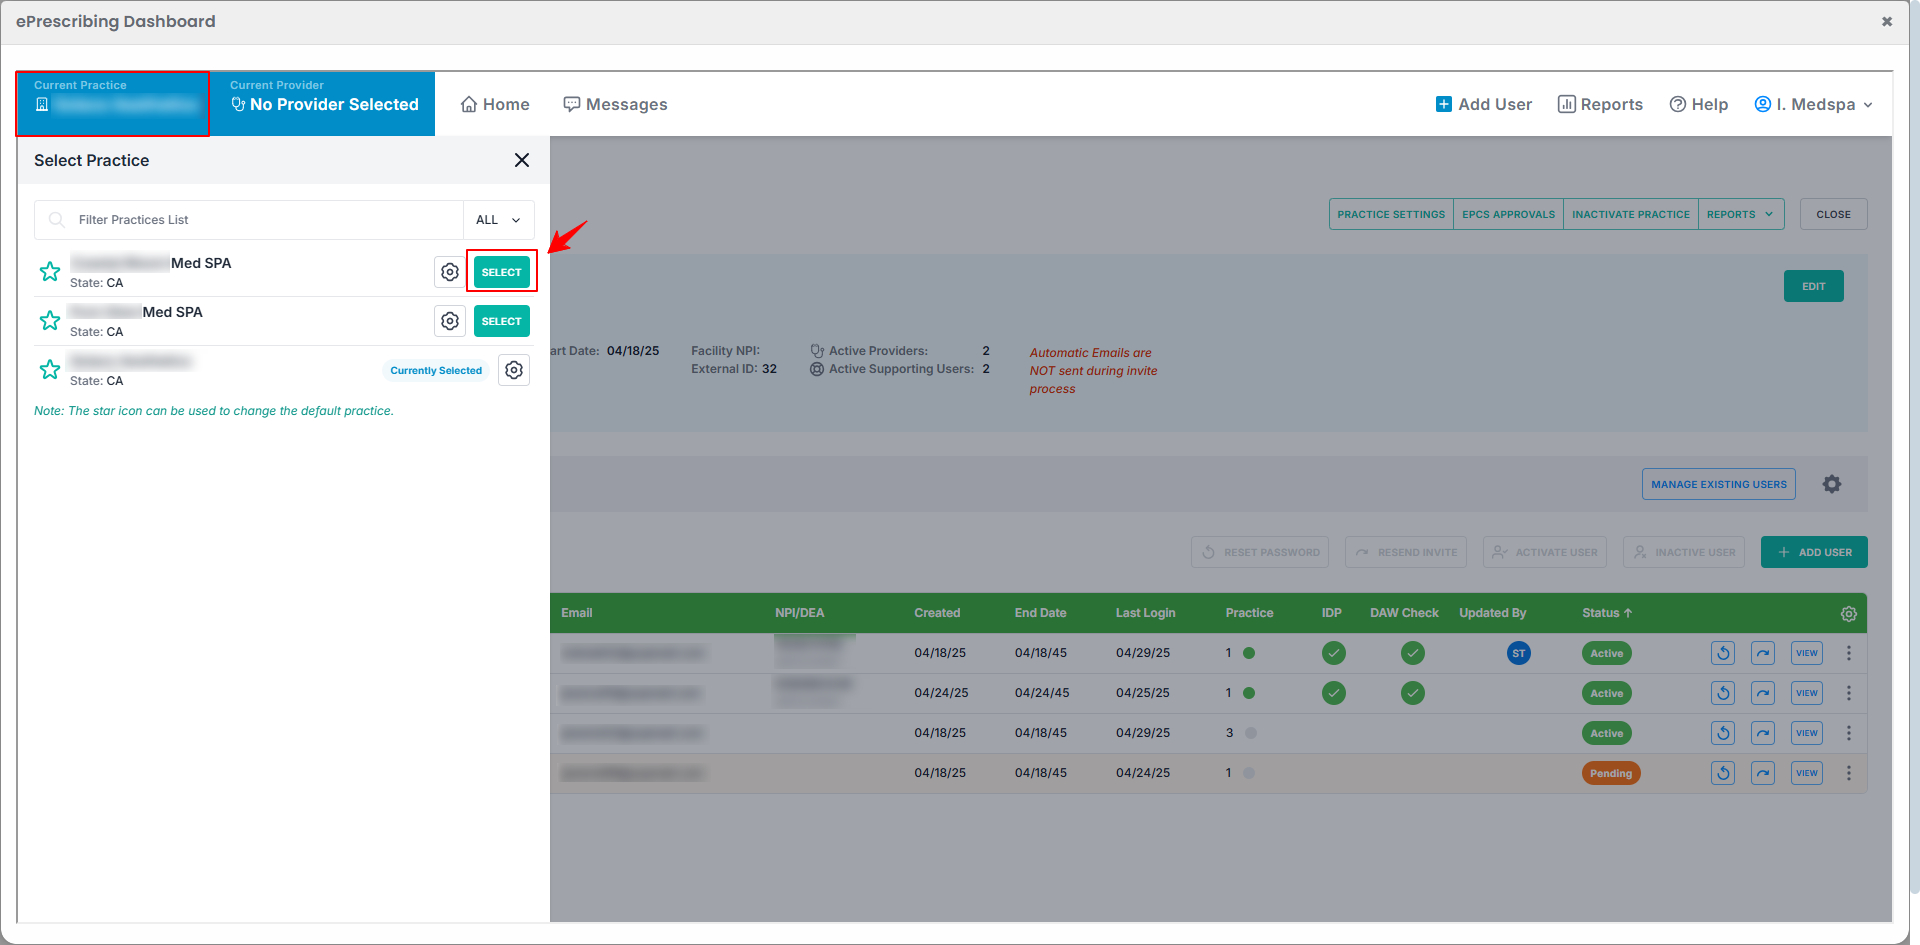 The new location will be successfully selected!