DigiMEDSPA EMR
 DigiMEDSPA CONNECT ™
Onboarding of a New Client
Once a new client contacts DigiMEDSPA, the team will create the client's account on the portal and send them a welcome email containing their package details. This guide outlines the next steps the client should follow to complete their onboarding process efficiently.
Understanding Terminologies
New Client
A new client refers to an individual or business entity that has recently signed up or is in the process of registering to use the services offered by a company or platform for the first time.
Onboarding
Onboarding is the structured process of introducing and integrating a new client into a system, platform, or service, ensuring they have the necessary information, tools, and support to get started successfully.
Onboarding of a New Client
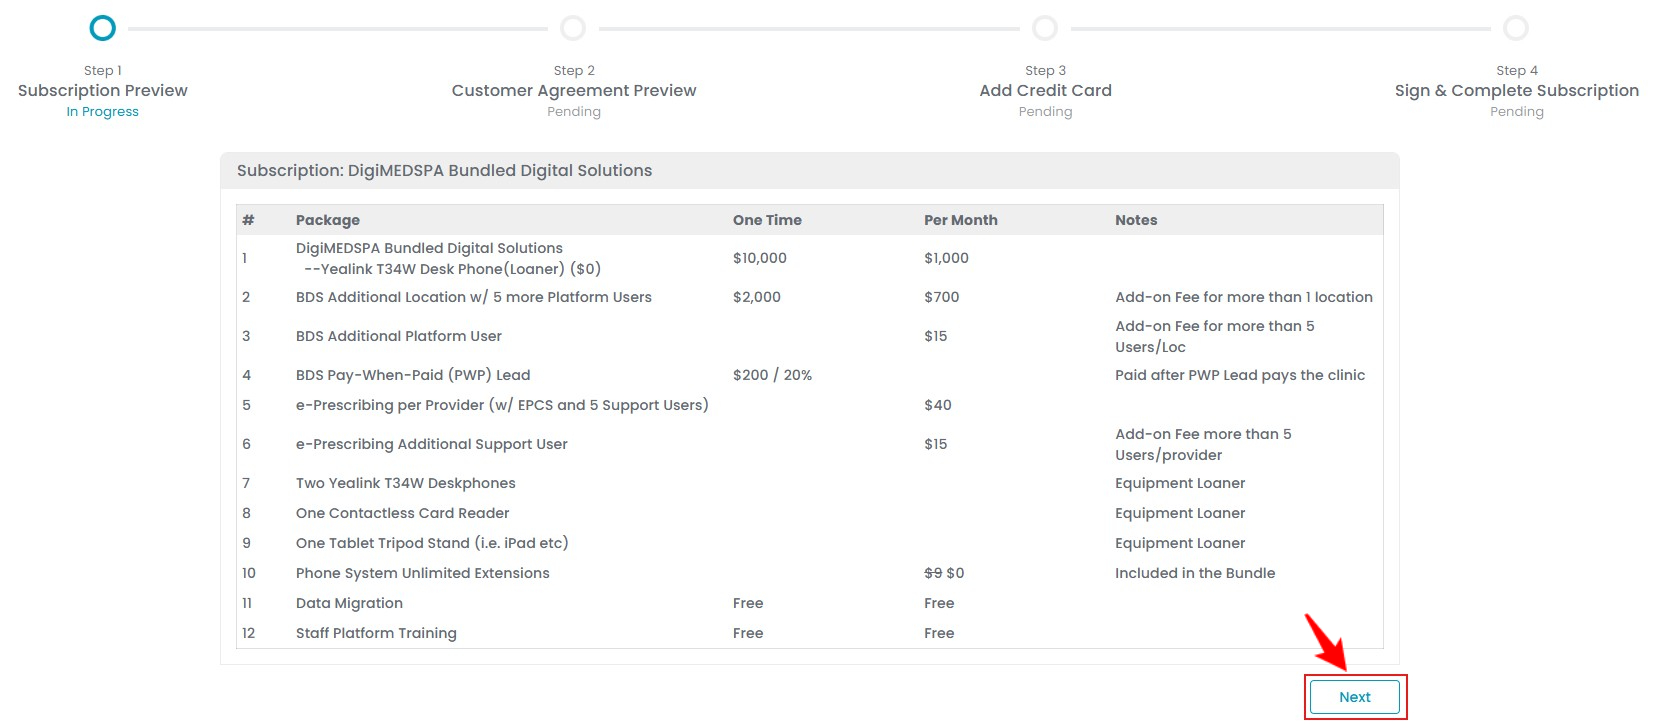
- Once the new client account is created by our team, the client will receive an email with the Client Service Agreement (CSA), outlining the details of their selected package. To continue with the onboarding process, the client must click on “Sign Now to Complete Your Order.”

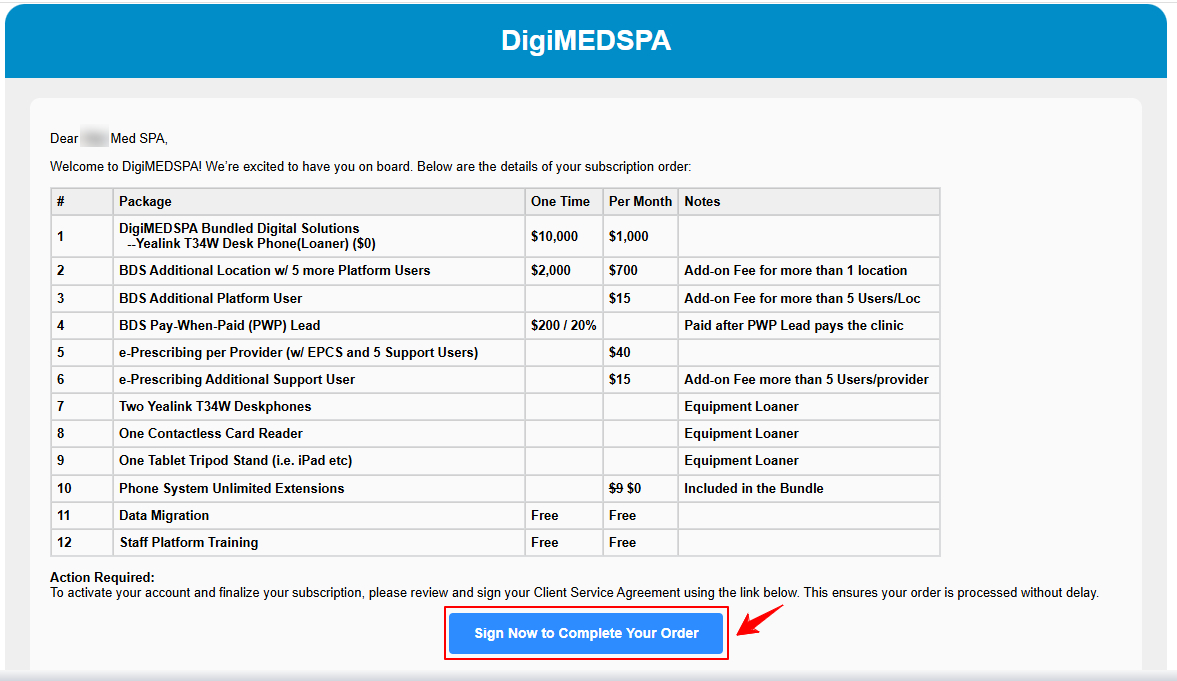 Note: A “Client Service Agreement (CSA)” is a formal contract between a service provider and a client that outlines the scope of services, terms and conditions, pricing, responsibilities, and other essential details of the engagement. It ensures mutual understanding and sets clear expectations for both parties.
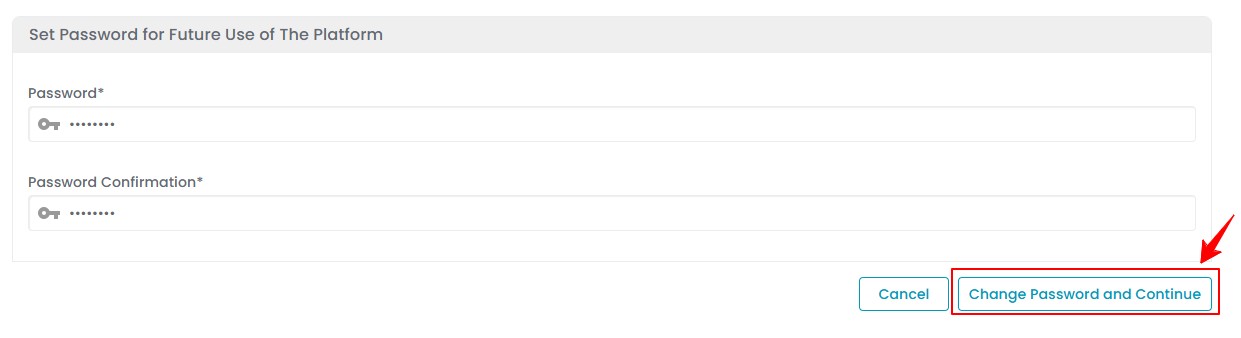
 - To set a password for future access, enter your desired password in both the Password and Password Confirmation fields, then click “Change Password and Continue.”
- The client will be directed to Step 1 of the onboarding process, where a preview of the subscription will be displayed. Review the subscription details, then click “Next” to proceed.
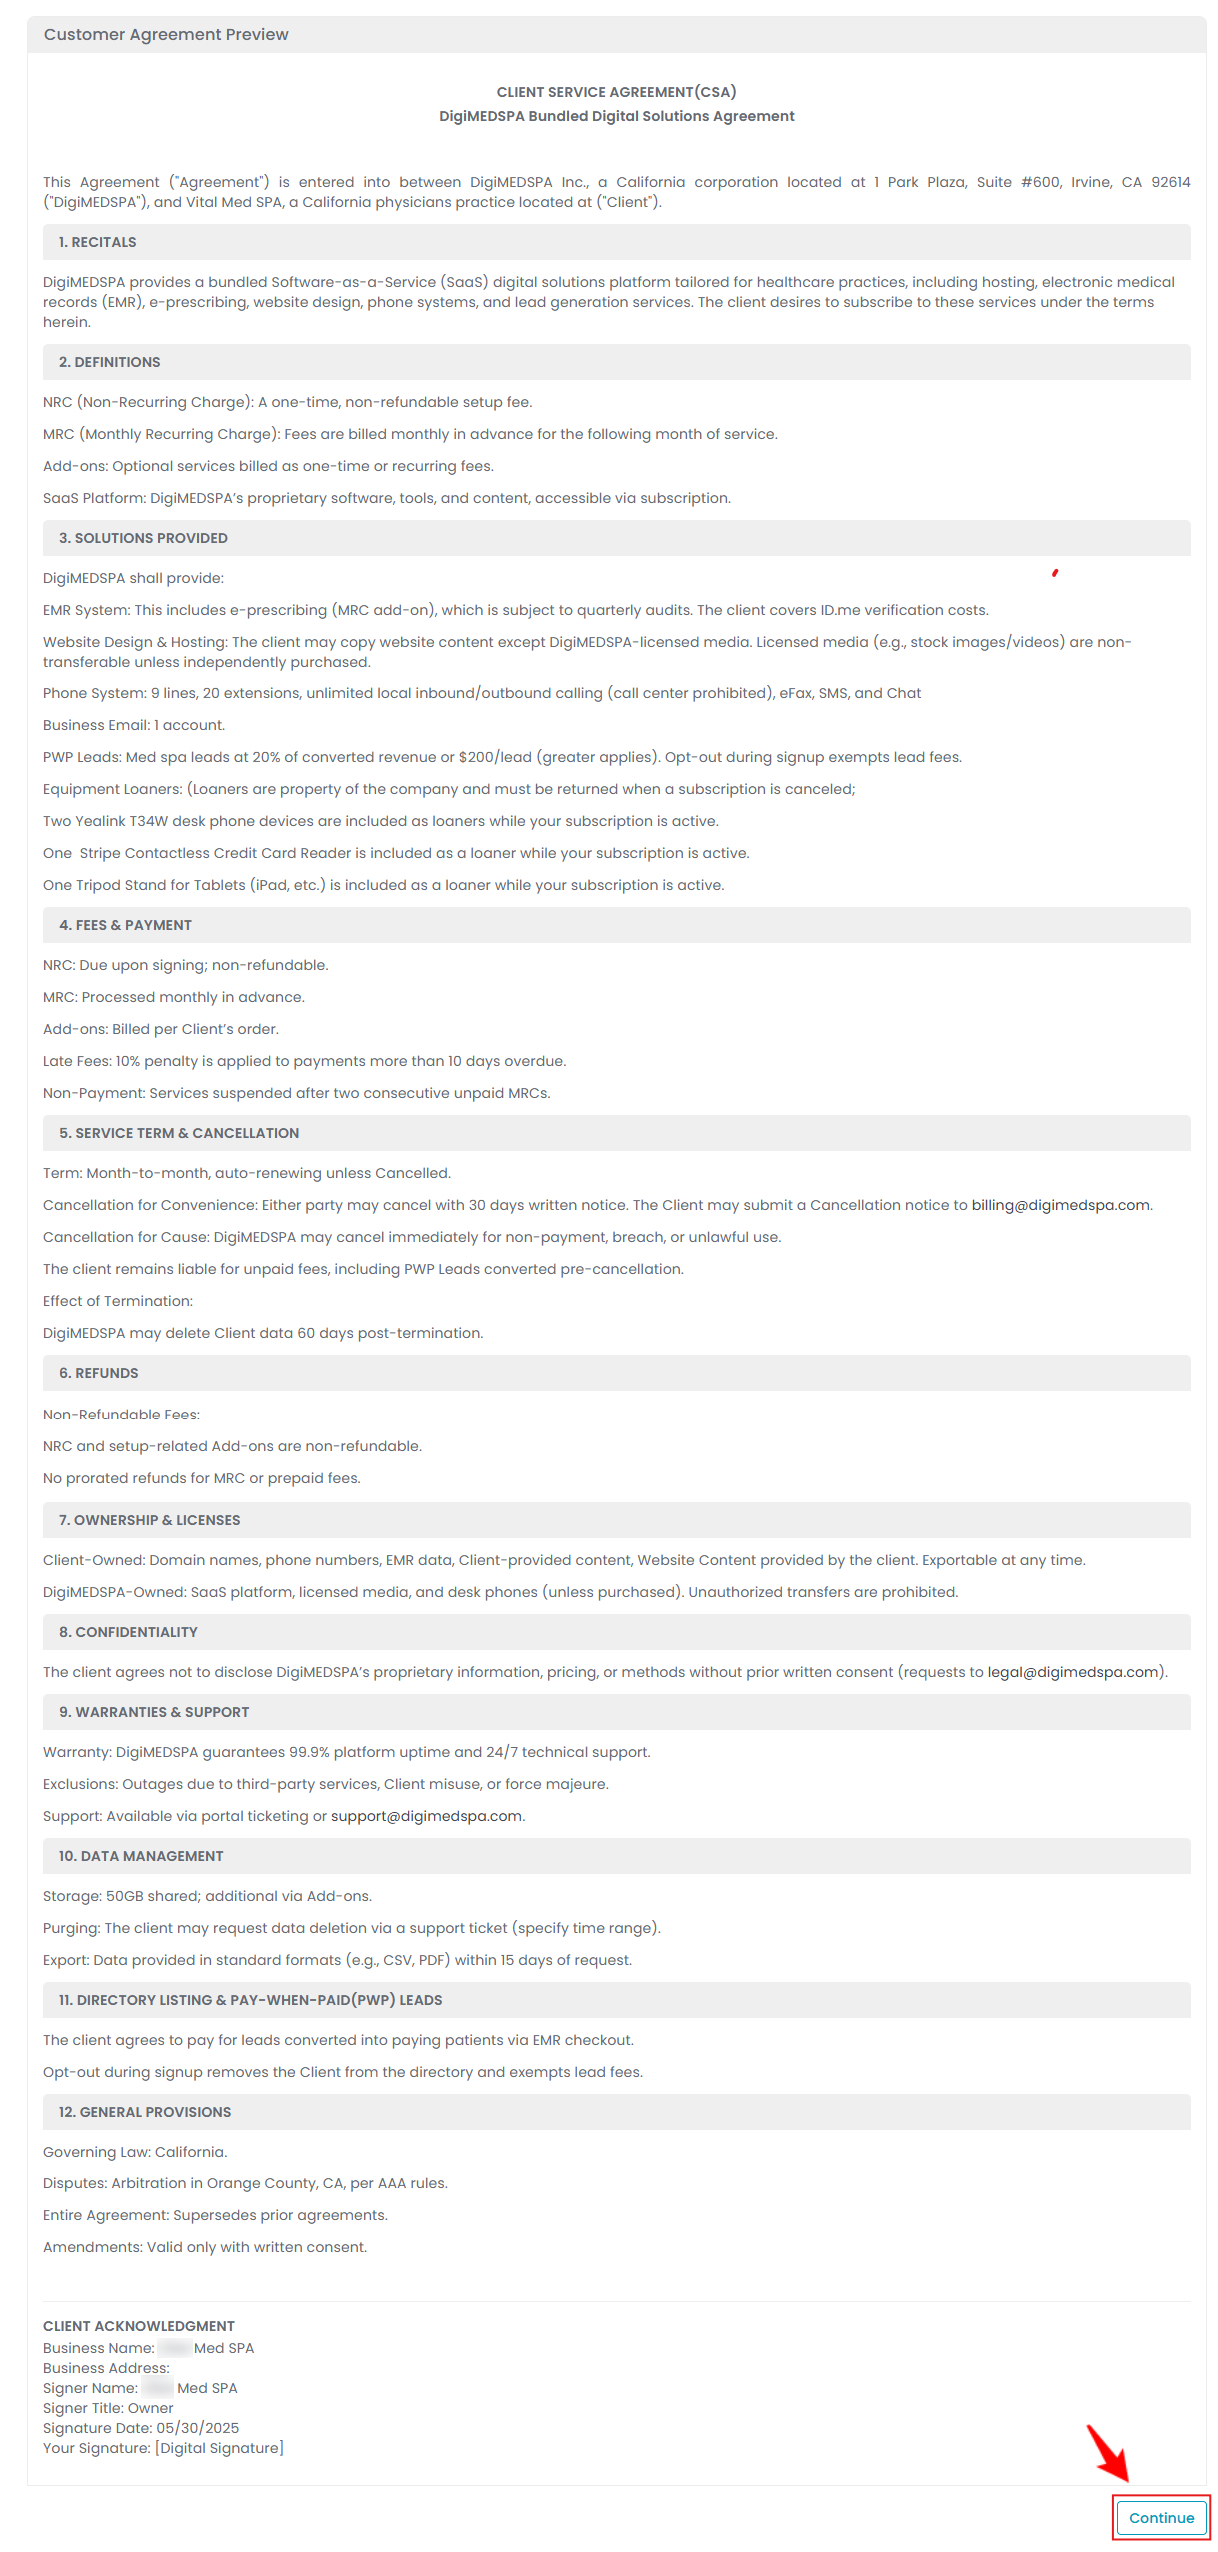
- In Step 2, the Client Service Agreement (CSA) will be displayed. Review the agreement, then click “Continue” to proceed.
- In Step 3, enter the credit card details, including the Card Number, Expiration Month and Year, and CVV number.

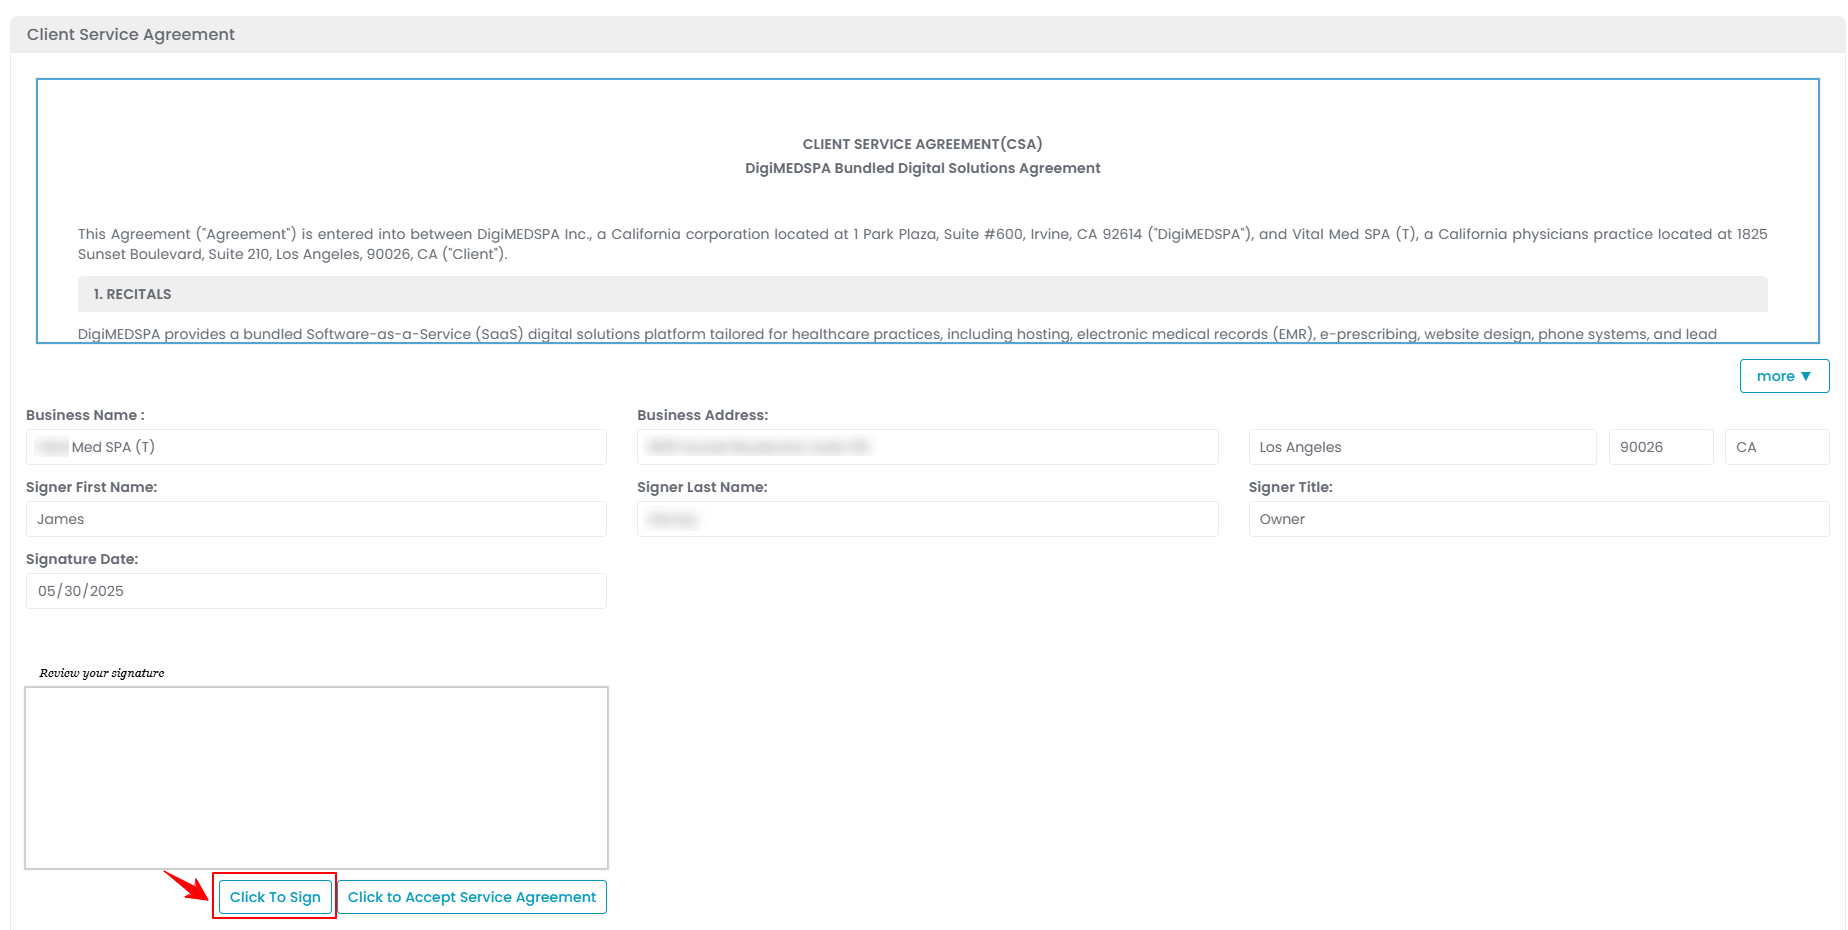
- In Step 4, enter the Business Name and Address, the Signer’s First and Last Name, Title, and the Signature Date. Once all fields are completed, click the “Click to Sign” button to sign the agreement.
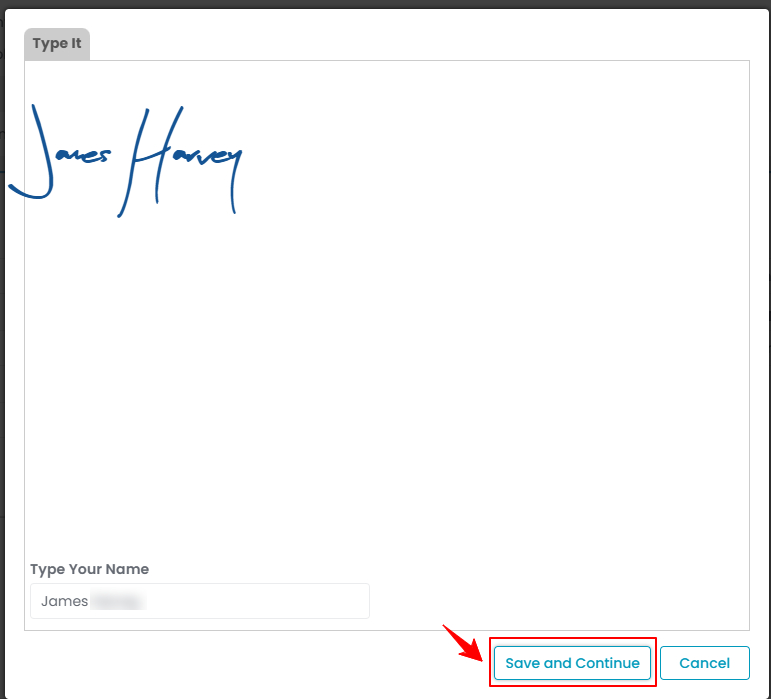
- Enter the client’s name in the designated field, then click “Save and Continue” to apply and save your digital signature.
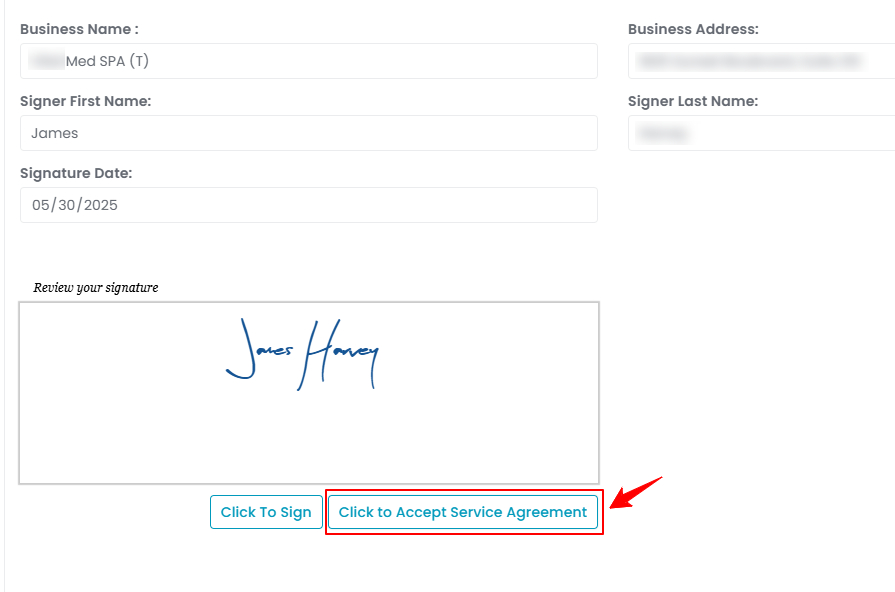
- Once all required information is completed, click “Click to Accept Service Agreement” to proceed.
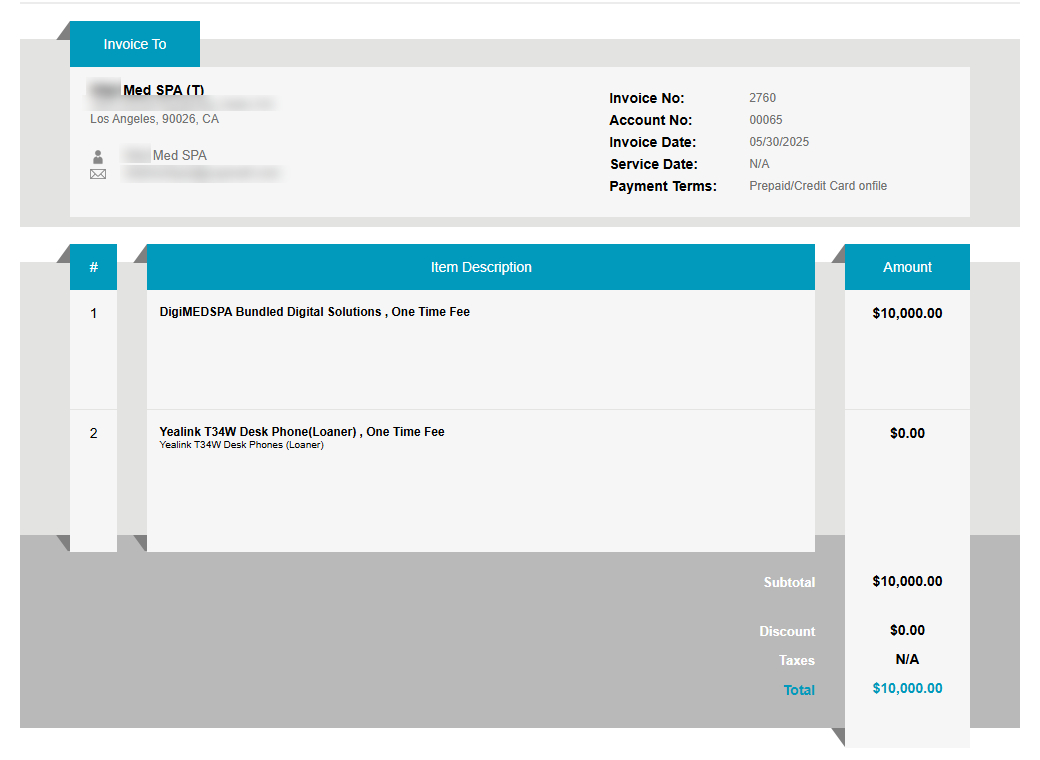
- After completing the onboarding steps, review the invoice for your selected package, then click “View Subscription” at the bottom of the screen to proceed.
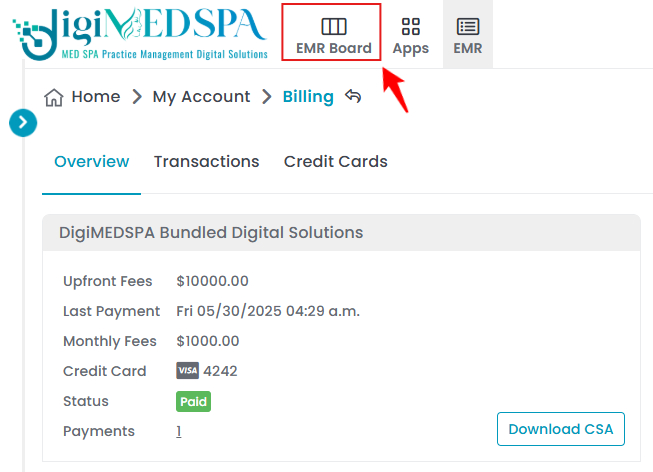
- Once the package overview is displayed, click on “EMR Board” in the Top Menu Navigation to proceed to your dashboard.
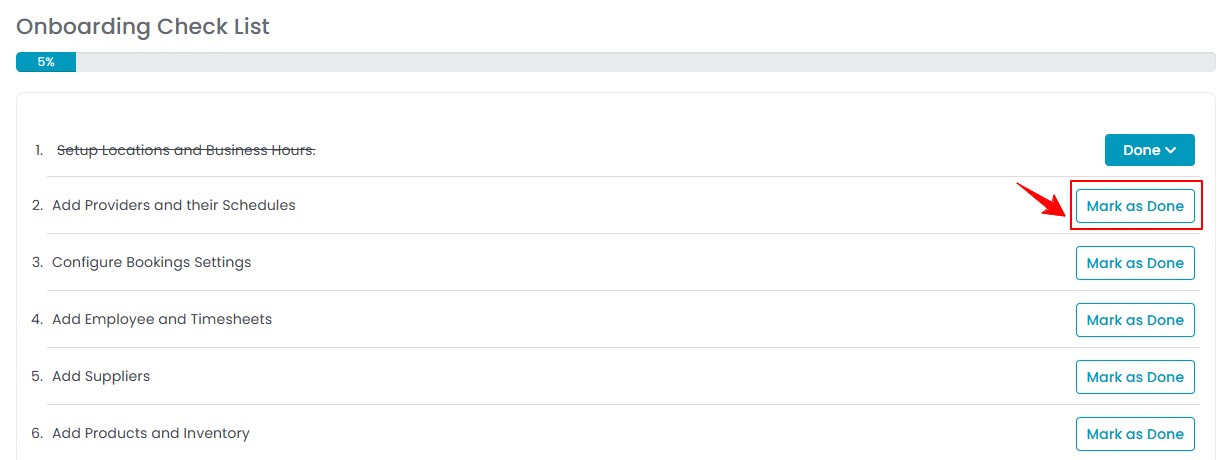
- Complete the Onboarding Check List.

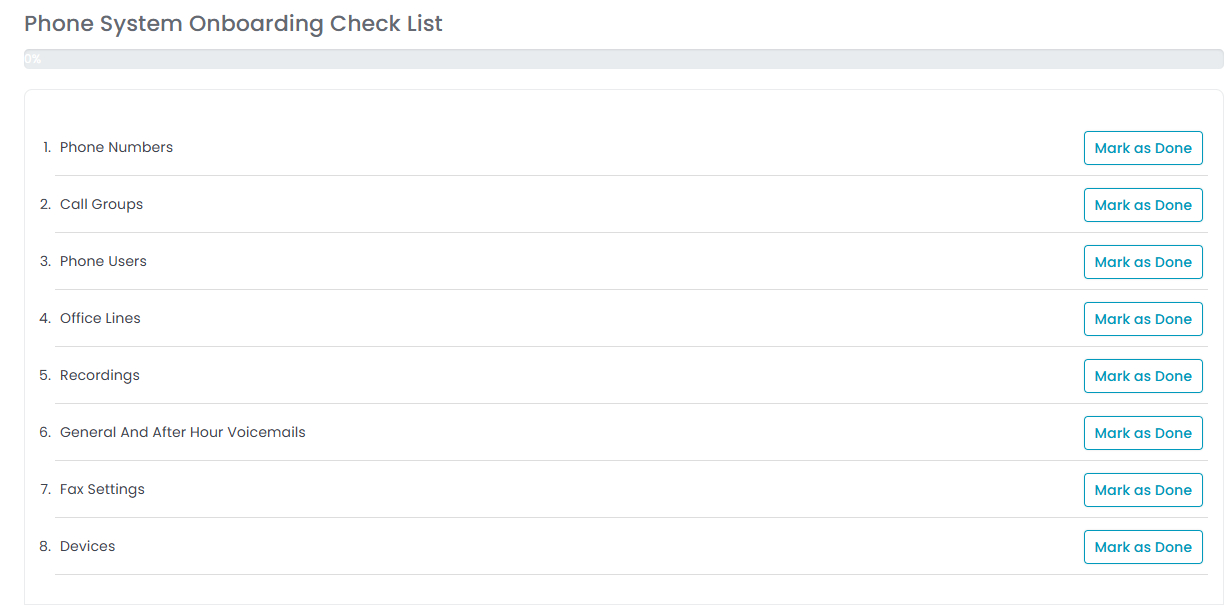
- Complete the Phone System Onboarding Check List.
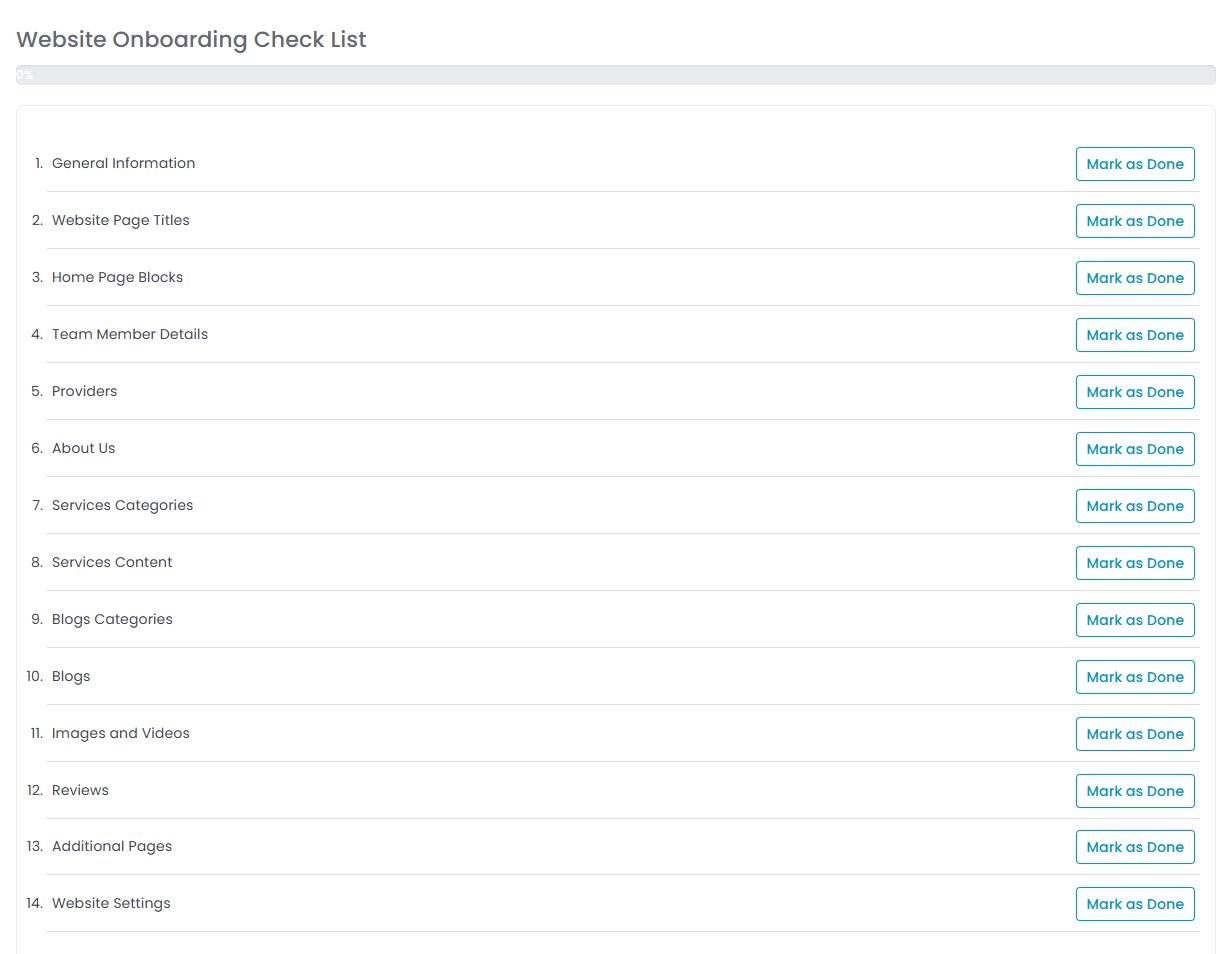
- Complete the Website Onboarding Check List.
 Note: As you complete each section, click “Mark as Done” next to it to update the check list and finish the onboarding process.